| Rozz™ Tools |
|
TABLE OF CONTENTS
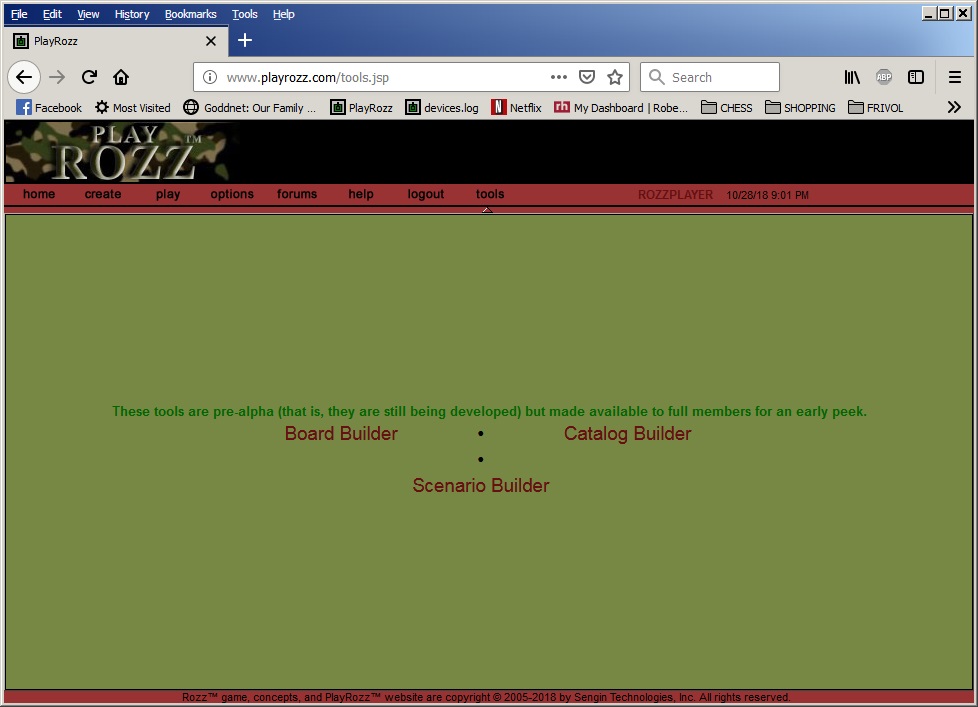
Tools are available to full members for creating custom boards, catalogs and scenarios.
These tools are not very user-friendly, but we figured we'd make them available to those who are interested.
This help file will try provide a basic sense of how to use the tools.
You may need to expand the size of your browser to show everything, but the board builder basically look like this:
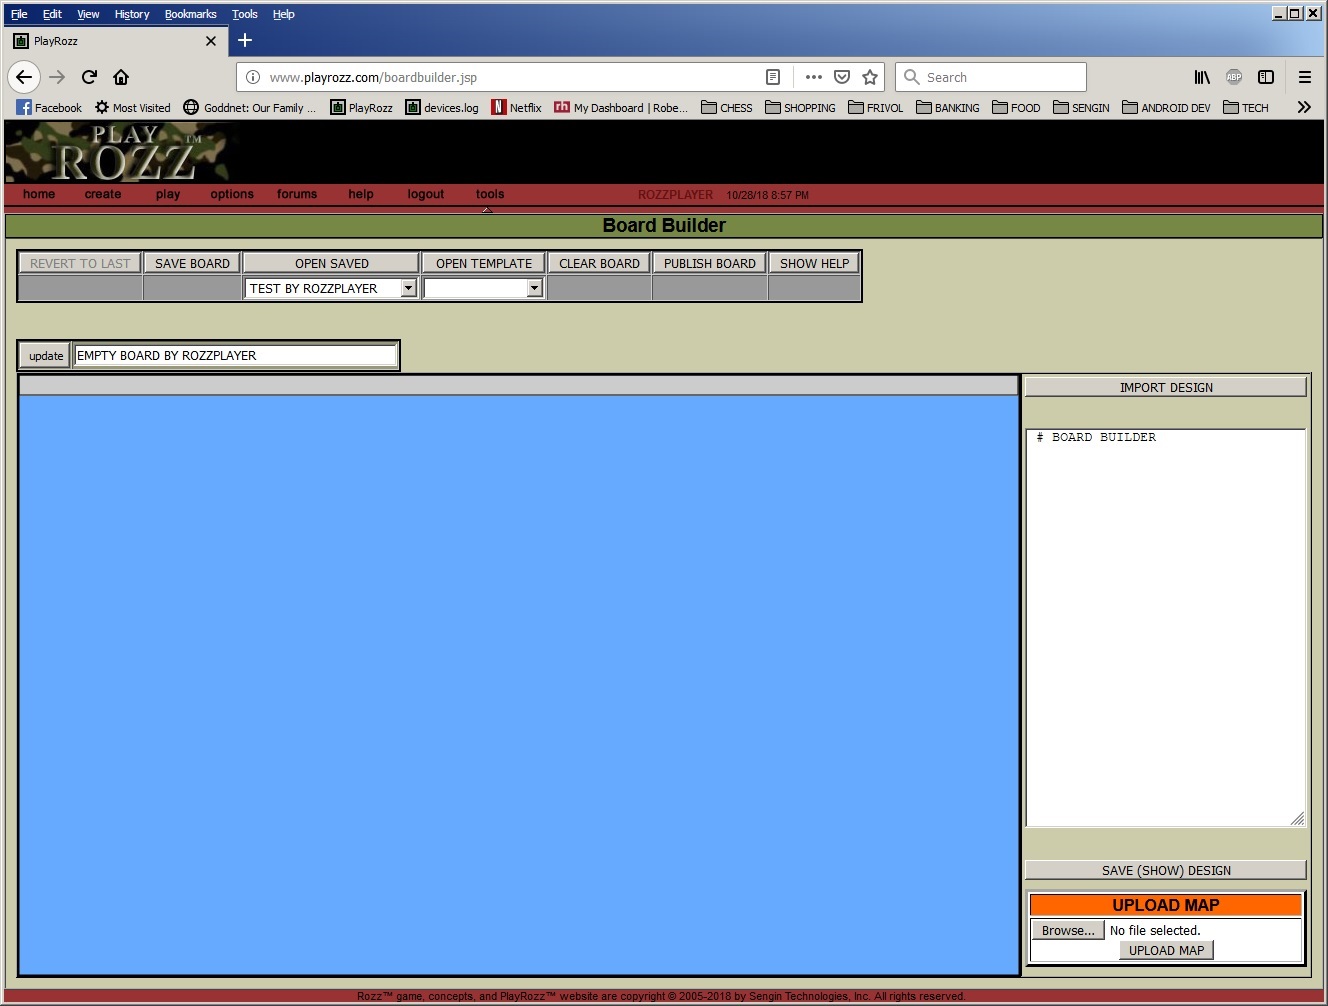
A board is made up of tiles, each with a name, and links to show which tiles are connected to others. For real-world board, these tiles are polygons (a series of coordinates defining the shape). For a hex-based board, the game knows the shape of a hex so you could just provide a single coordinate to place one. Some basic things to keep in mind:
We will start with a new board named TEST.
Notice that when you type TEST as the name of the board, that section turns blue to let you know you have to click update.
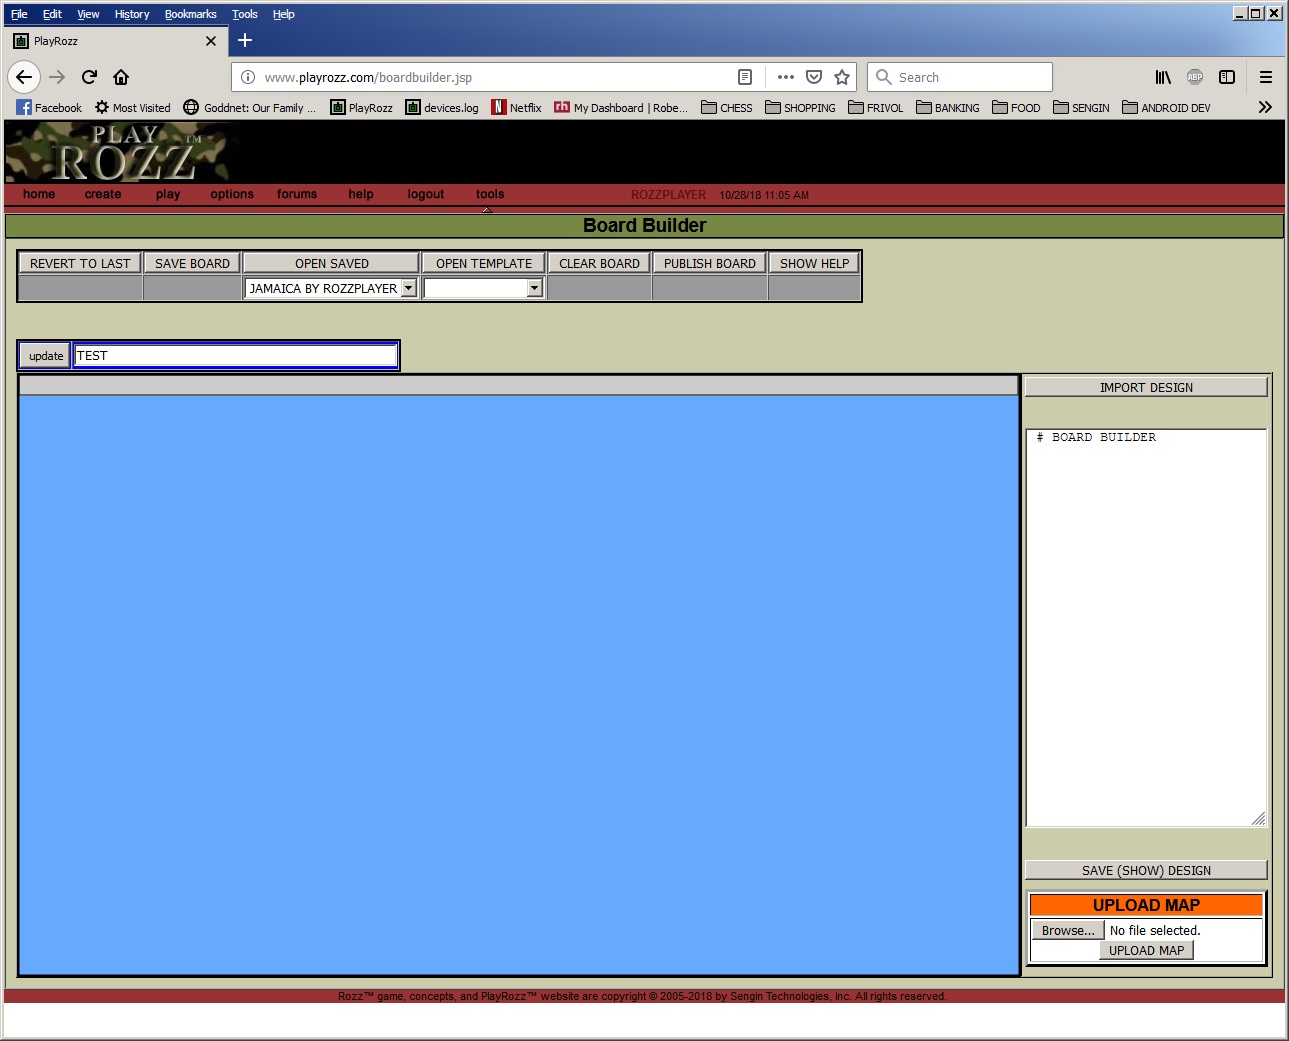
After you click update, the board refreshes. Click the SAVE BOARD button to save your board to the server. Now let's place a simple hex tile. Hold SHIFT and click to an open area in the middle of the board. 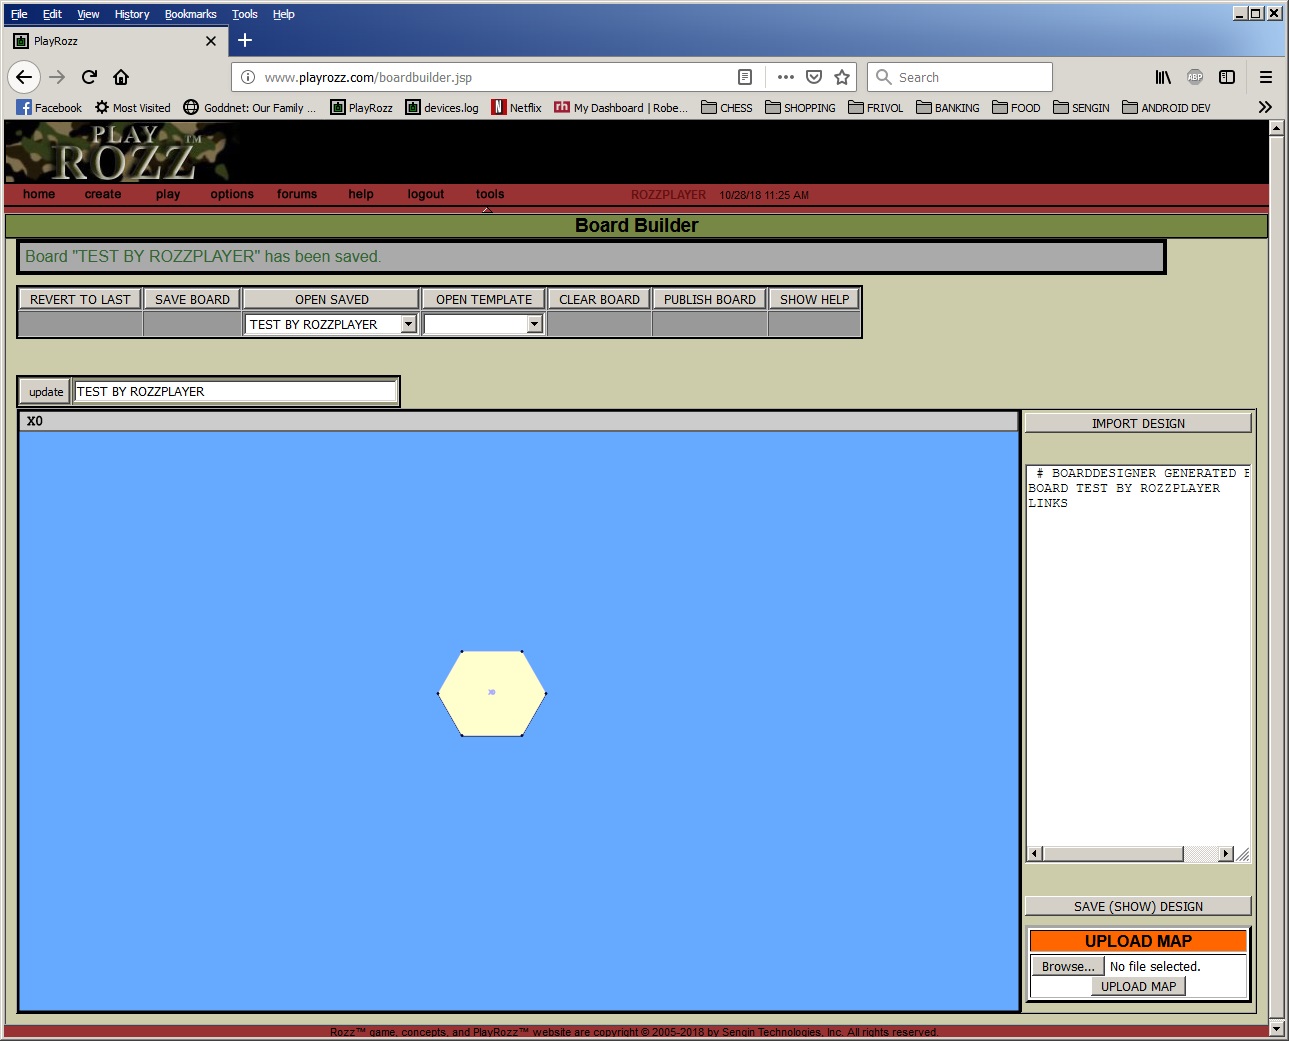
(You could move the tile by dragging it, or delete it by pressing the delete key.) Create a second tile by holding SHIFT and clicking a nearby open area. 
Notice that one tile is selected and shows dots at the corners. You can press SHIFT and click between the tiles to select them. (Note, as before, if you SHIFT and click to an empty area of the screen, it will create a new tile.) The name of the selected tile shows in the gray status bar (in the case above, it shows "X1"). Click the SAVE BOARD button frequently to save your work. A message will come up asking if you want to overwrite, so choose YES. You can press CTRL and click to zoom in, or CTRL and right-click to zoom out: 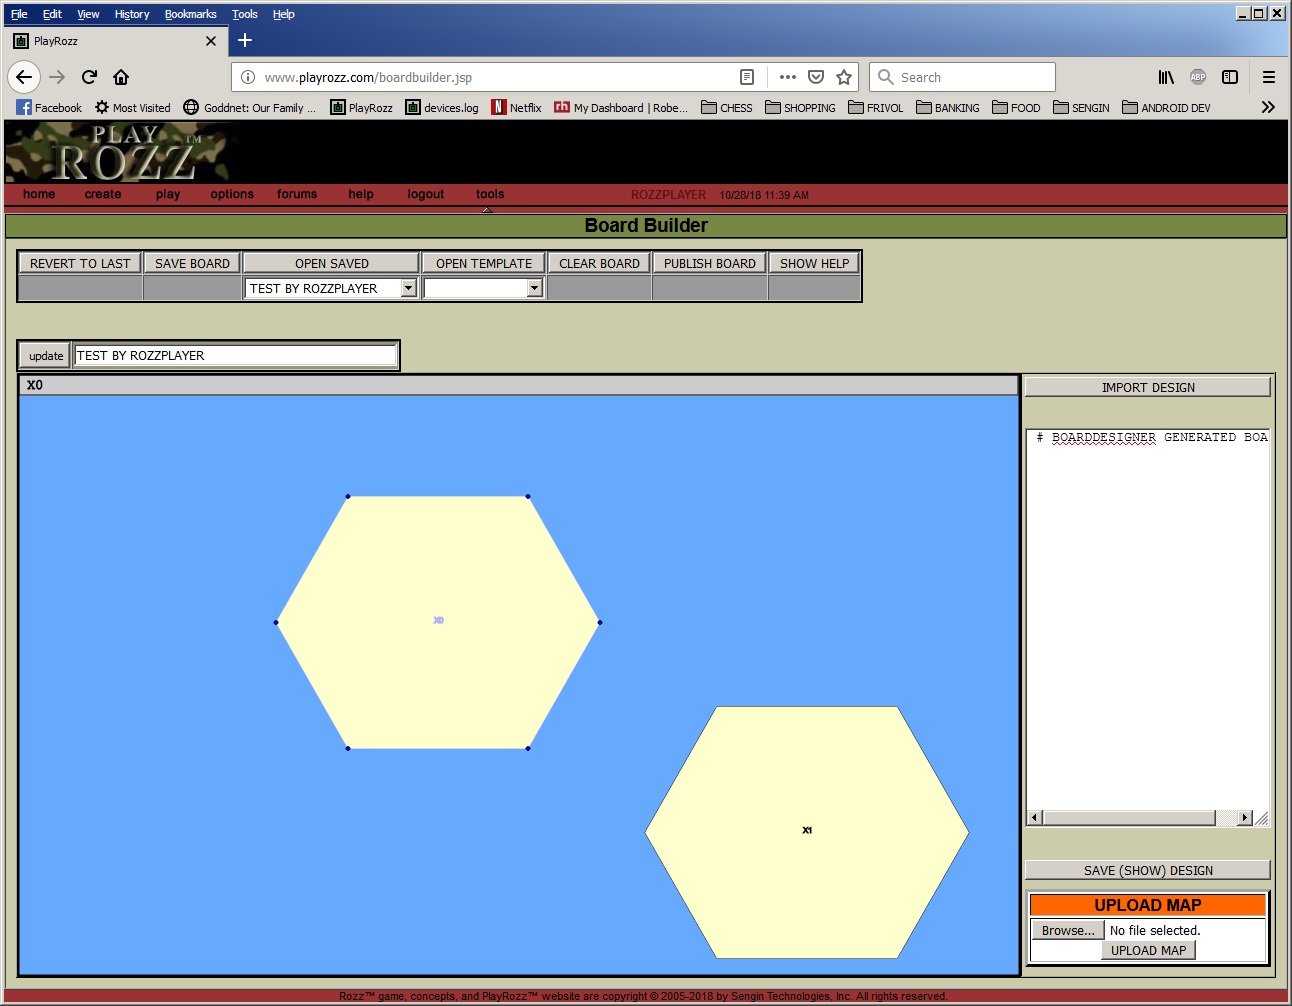
You can also drag the board by grabbing an empty area between tiles. DOUBLE-CLICK an empty area to recenter. With a tile selected, you can double-click the gray status bar (where the current name shows) to change the name of the tile. You can also reposition the tile (as a separate step, double-clicking again) with automatic hex-shaped positioning by entering coordinates, such as "-1,1" which would place it one unit to the left of center, and one unit down. 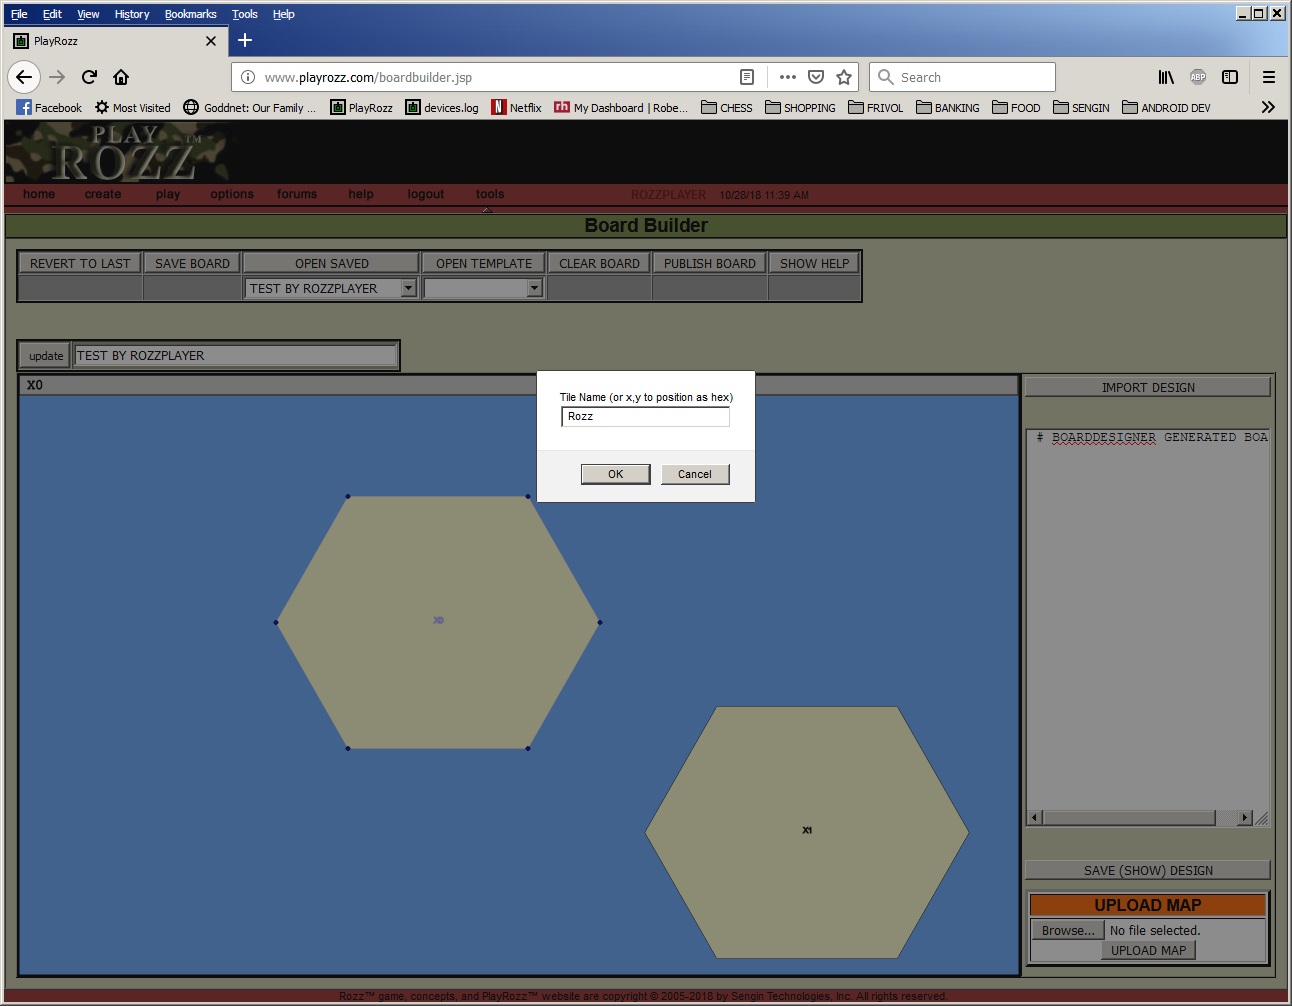
To create a link between tiles (so the game will know they are connected) select one with SHIFT-click, then link to the other with CTRL + SHIFT-click: 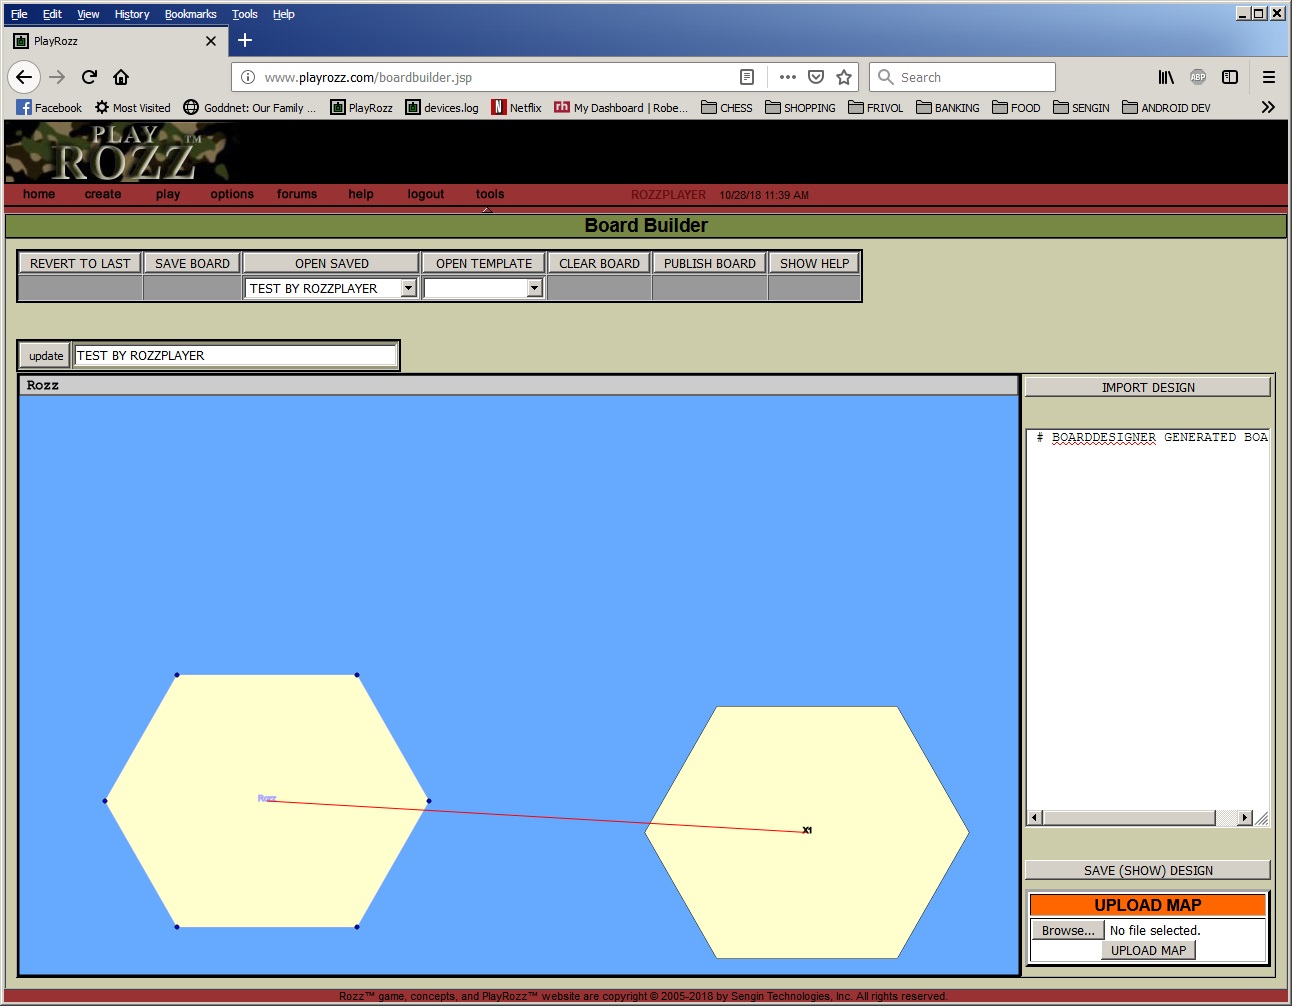
At any point you can click the "SAVE (SHOW) DESIGN" button and it will generate a text version of your board design, for example:
# BOARDDESIGNER GENERATED BOARD
It is a good idea to save the design text locally, as you can always paste it back into the text area and click the "IMPORT DESIGN" button. You could also modify the design manually and import it. For example, let's say we added the following shown in green:
# BOARDDESIGNER GENERATED BOARD
When we import the board, we would have: 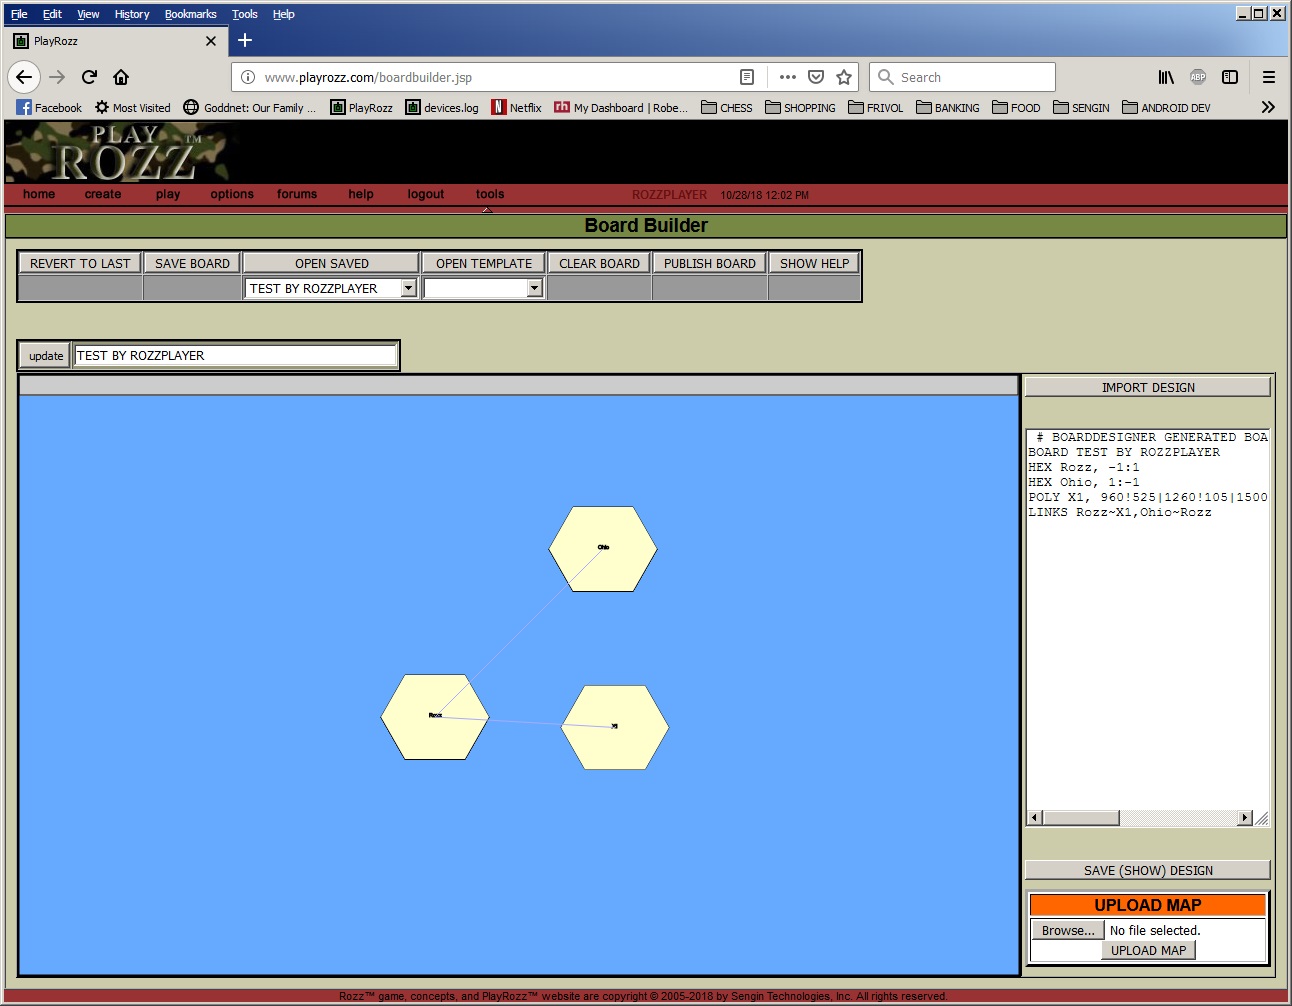
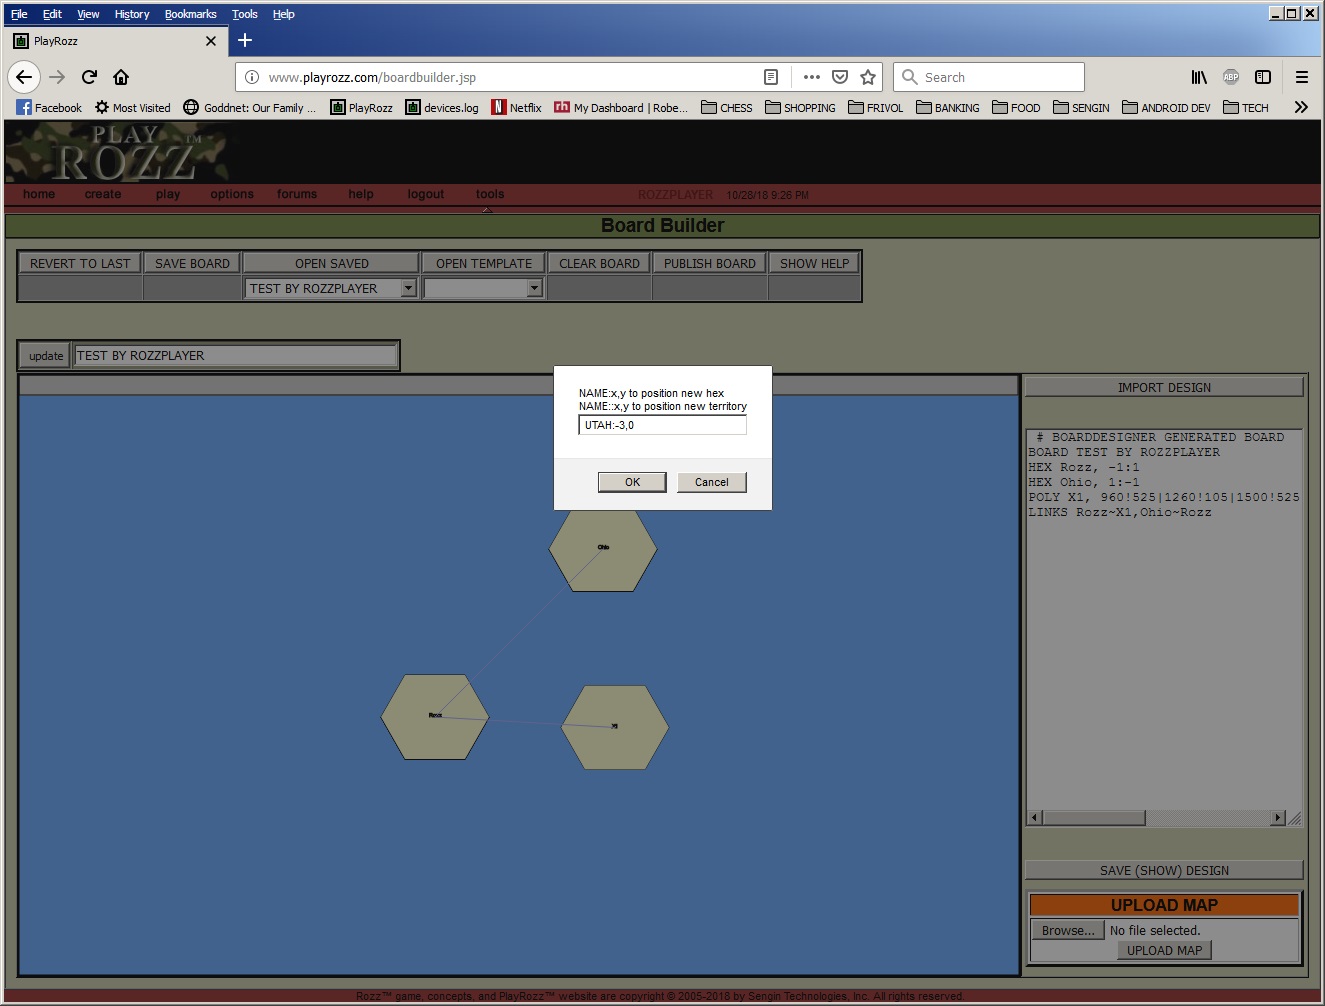
Instead of placing a new hex with SHIFT-click on an empty spot, you could double-click the status bar with no tiles selected). This pops up the option to provide a name and coordinate for a new hex, such as:
UTAH:-3,0
You could place an entire TERRITORY (a standard array of tiles), complete with links, by using two colons instead of one:
FLORIDA::4,1
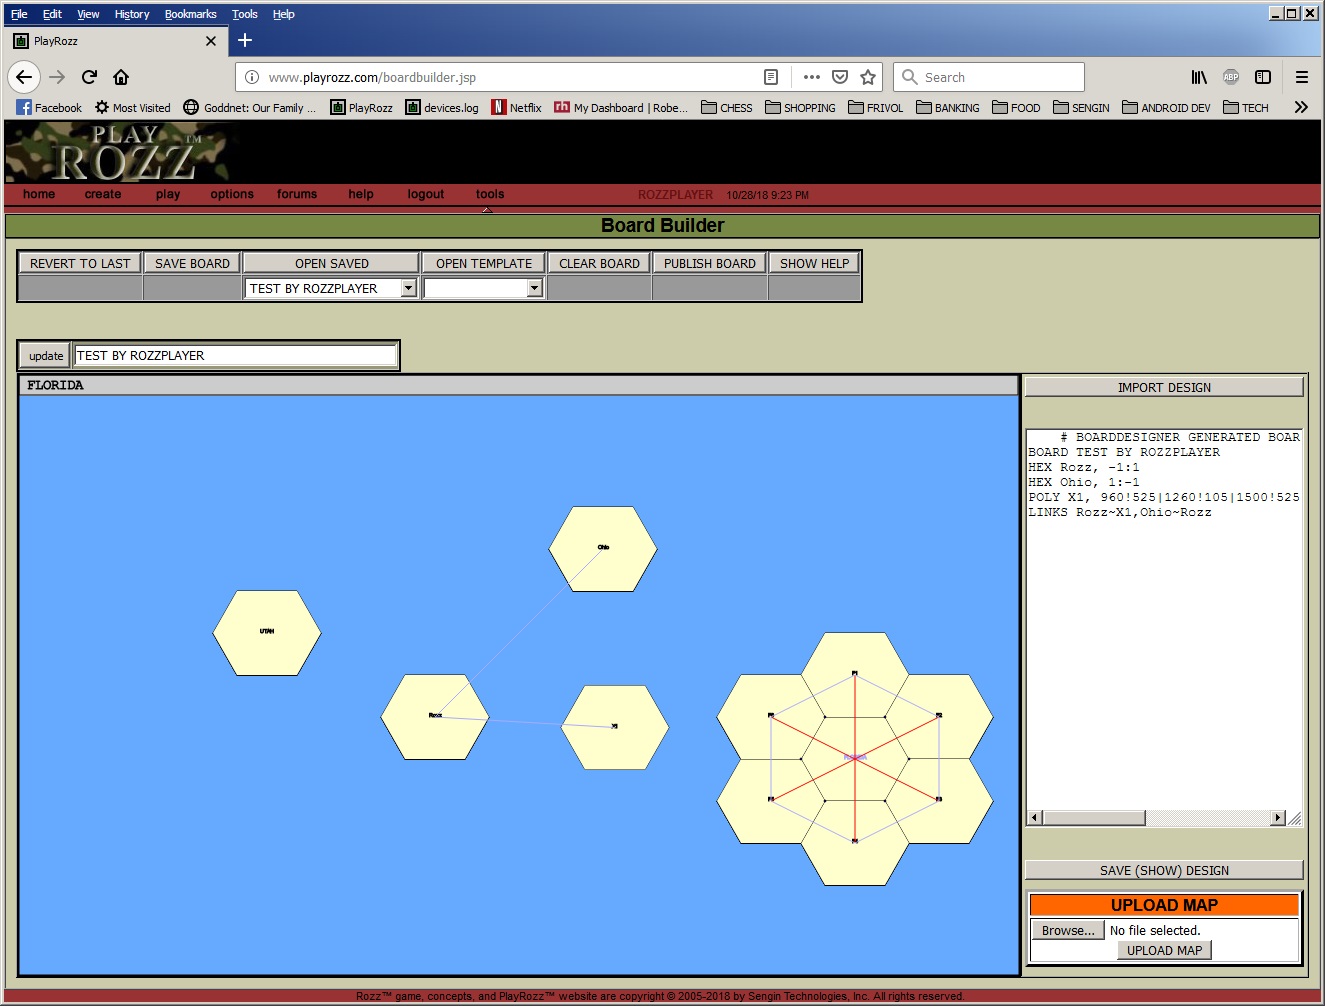
Essentially, that's all you need to create a hex-based board. Make sure all your tiles have appropriate links or they will be stranded. You can choose "OPEN TEMPLATE" to see what some of the existing boards look like, or to use as a starting point for your own boards.
It is a bit more tedious to create a real-world board, but it doesn't take long to get the hang of it.
For starters, let's click the "CLEAR BOARD" button and start with a single hex (SHIFT-click to create a hex): 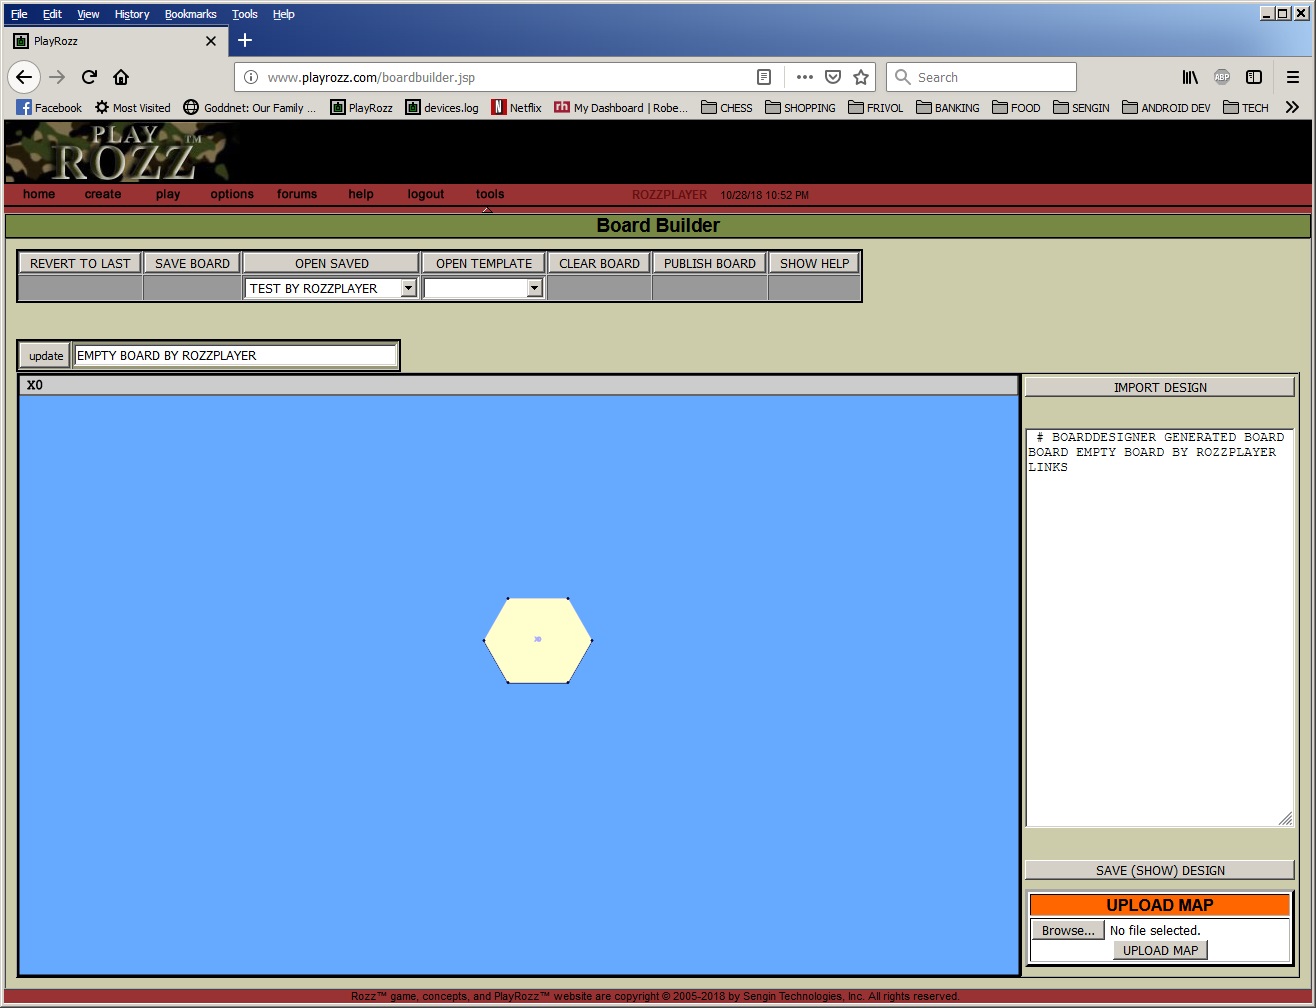
Make sure the hex is selected (SHIFT-click on the hex), then DRAG the blue dot at one of the corners to change the shape of the hex: 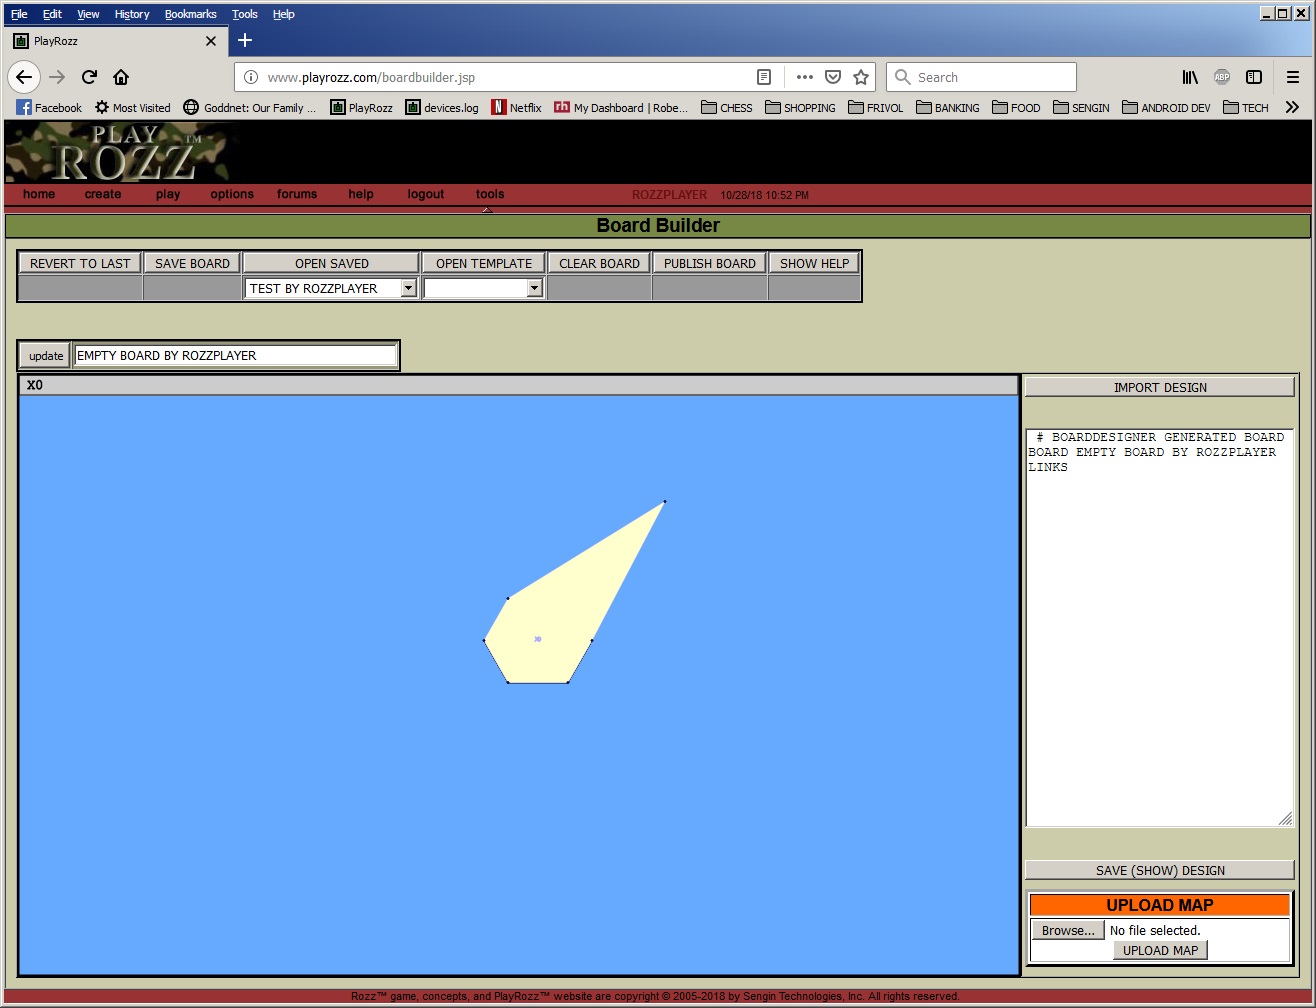
Hold ALT and click on an open edge of the hex, and it will add a new blue dot: 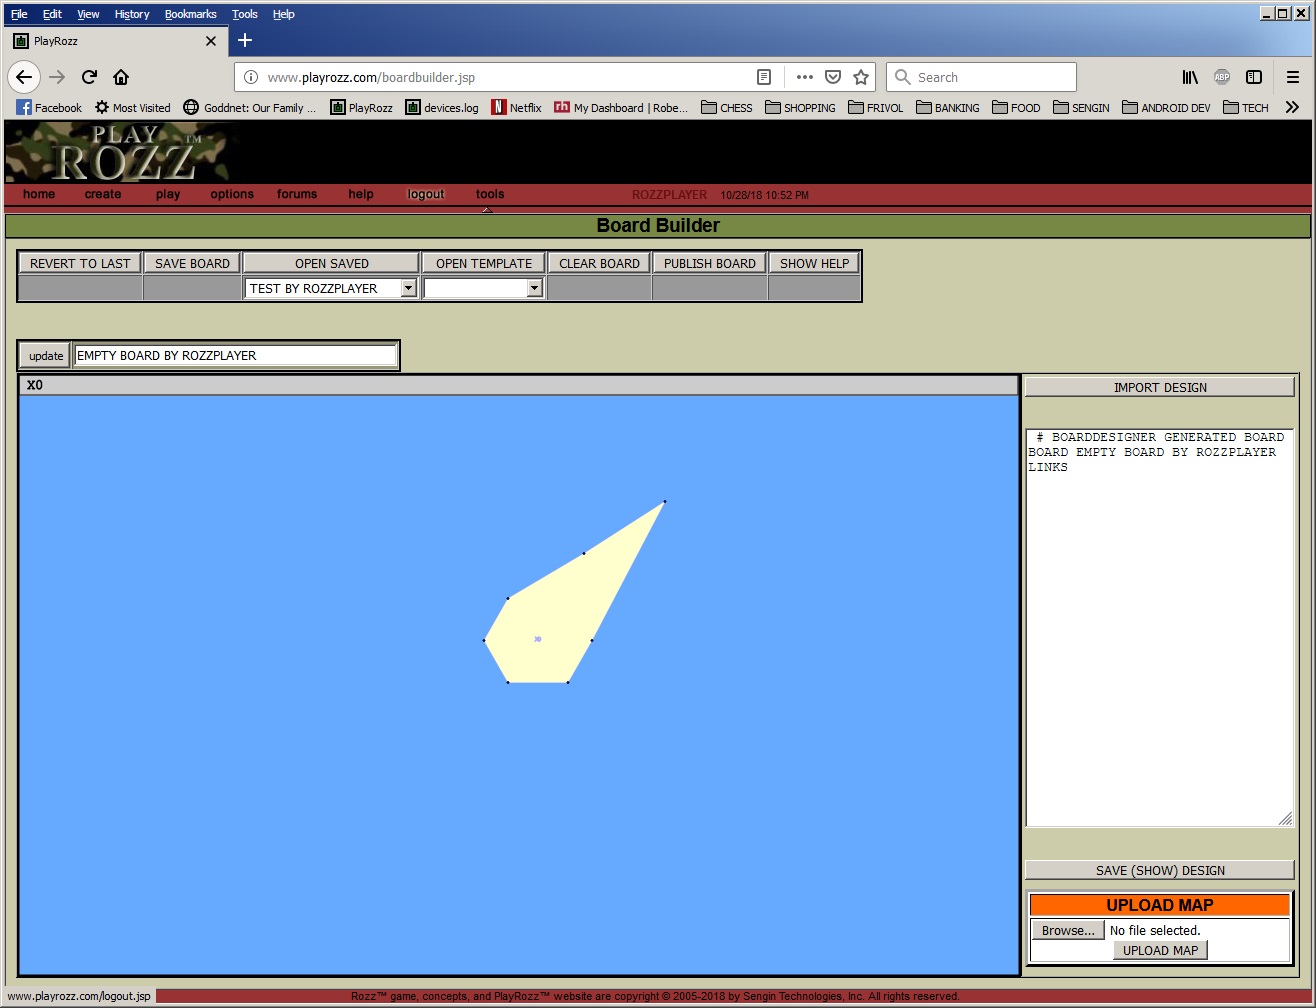
You can drag dots and reshape your tile any way you want. ALT-click to add dots, or ALT-RIGHT-click to remove them: 
Notice that the tile name can end up misplaced, or even off the tile altogether. You can SHIFT-click the tile to set the location for the name. (With no tile selected, the first SHIFT-click selects the tile, then the second SHIFT-click moves the name.) If you SHIFT-click instead on a blue dot, it will create a darker edge line. A second SHIFT-click on the same dot will remove the darker edge. 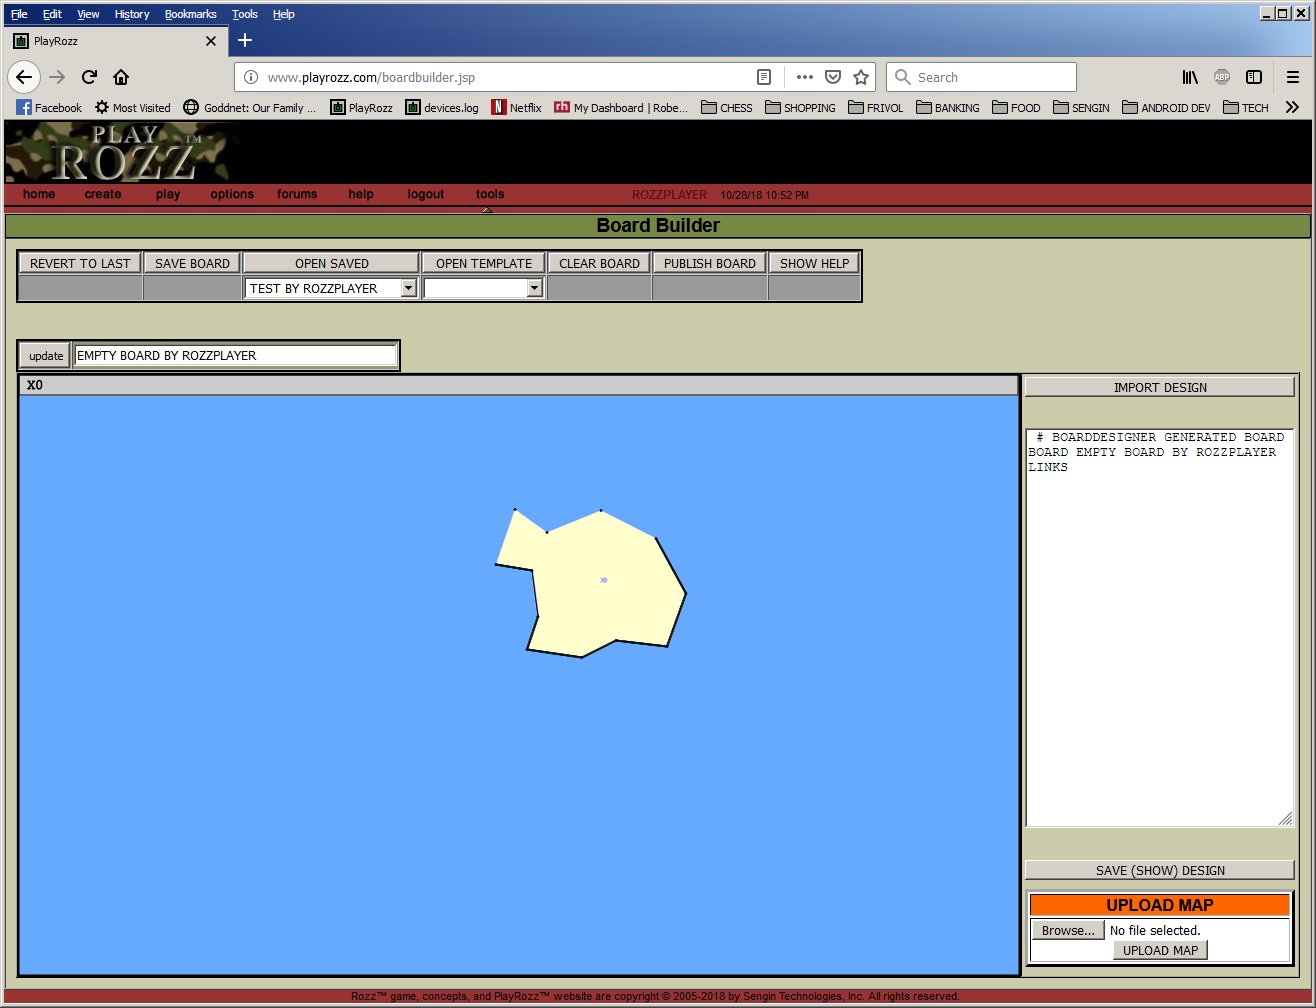
Remember, it's a good idea to click "SAVE (SHOW) DESIGN" periodically and copy the output to a local text file for safe keeping. You can use the UPLOAD MAP option to upload a map to use as a guide for creating real-world tiles. It's easiest to stick with 1000x600 pixels. 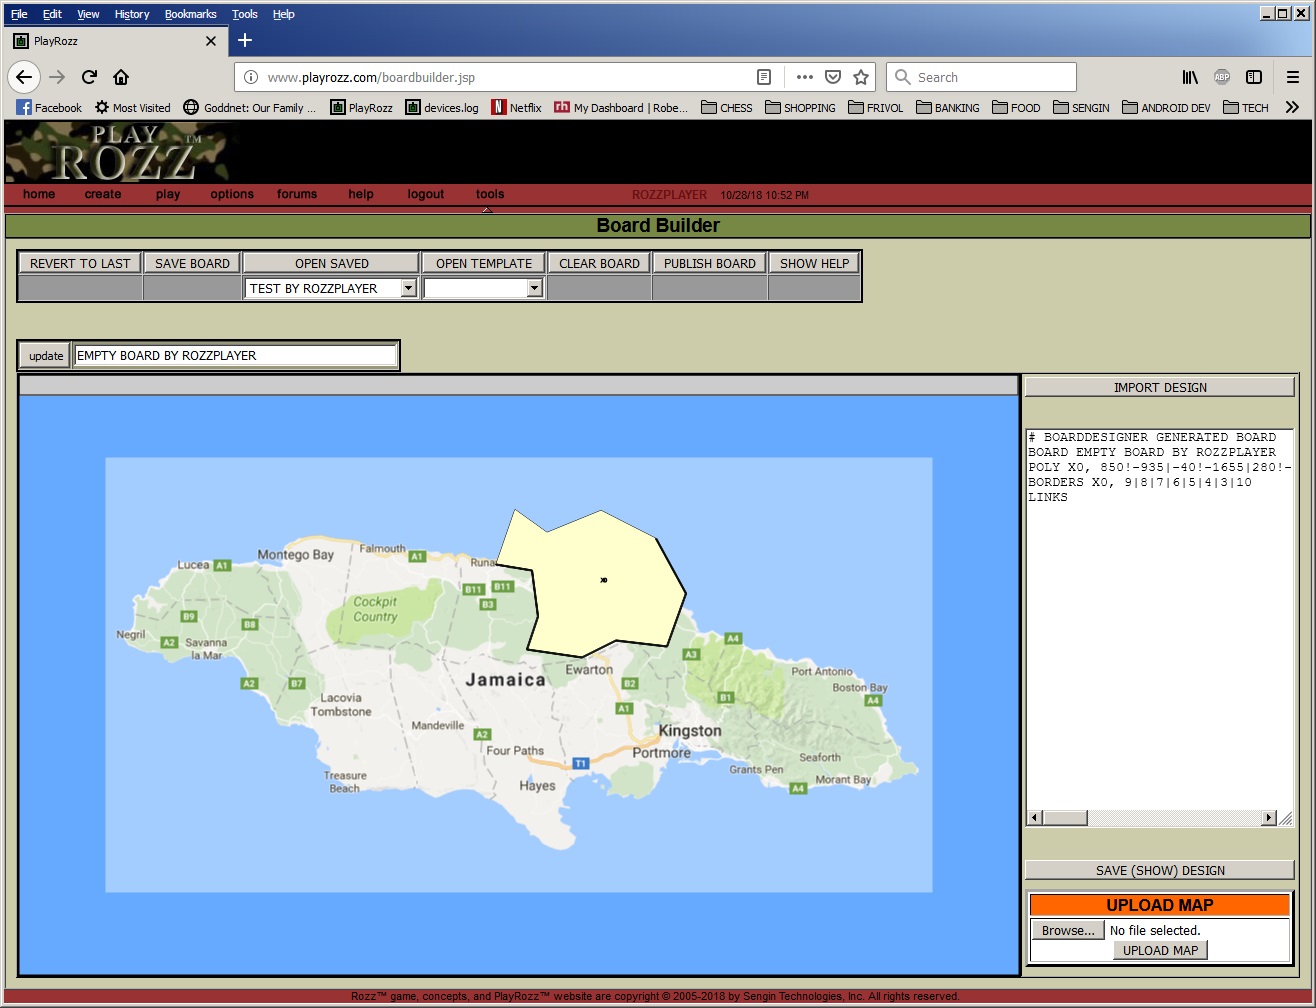
You can then shape your tiles using the map as a guide. (You can press "2" to hide the map and see what it would look like in the game.) 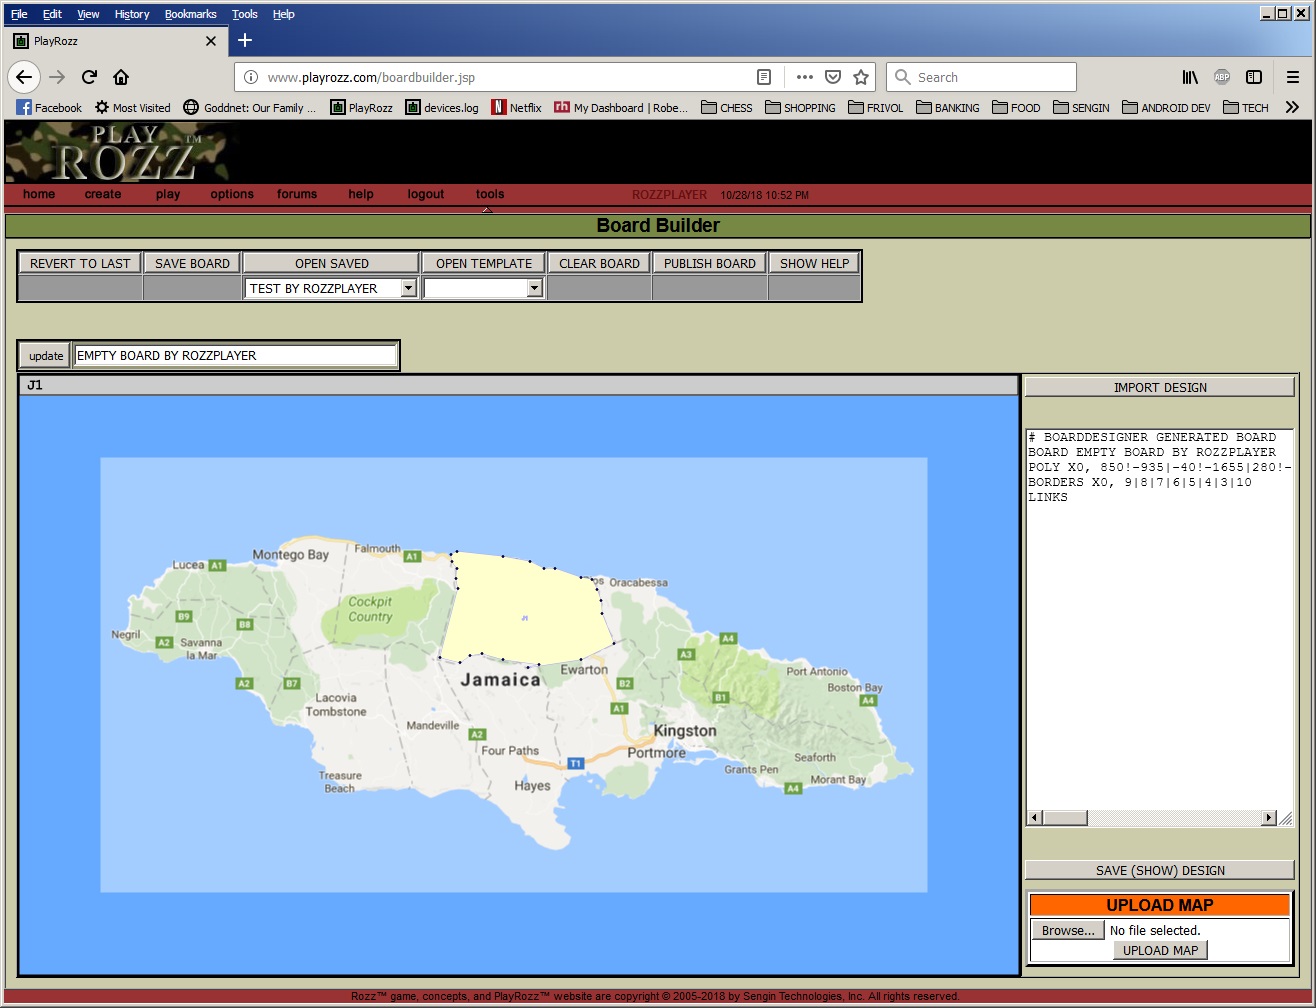
Click "SAVE (SHOW) DESIGN" to save a local copy of your board text. Change the name of your board. The panel turns blue to remind you that you need to update that section. 
Sometimes when you click update, you find that your session has timed out and you're logged off. This is why it's good to save a copy of your board. You might also be able to hit the back-arrow on your browser to recover your work! Click SAVE BOARD to save your board to the server. Then, you can return to it at a later time by using OPEN SAVED. When you are creating subsequent tiles, you may find it easiest to shape the borders between tiles with a little gap: 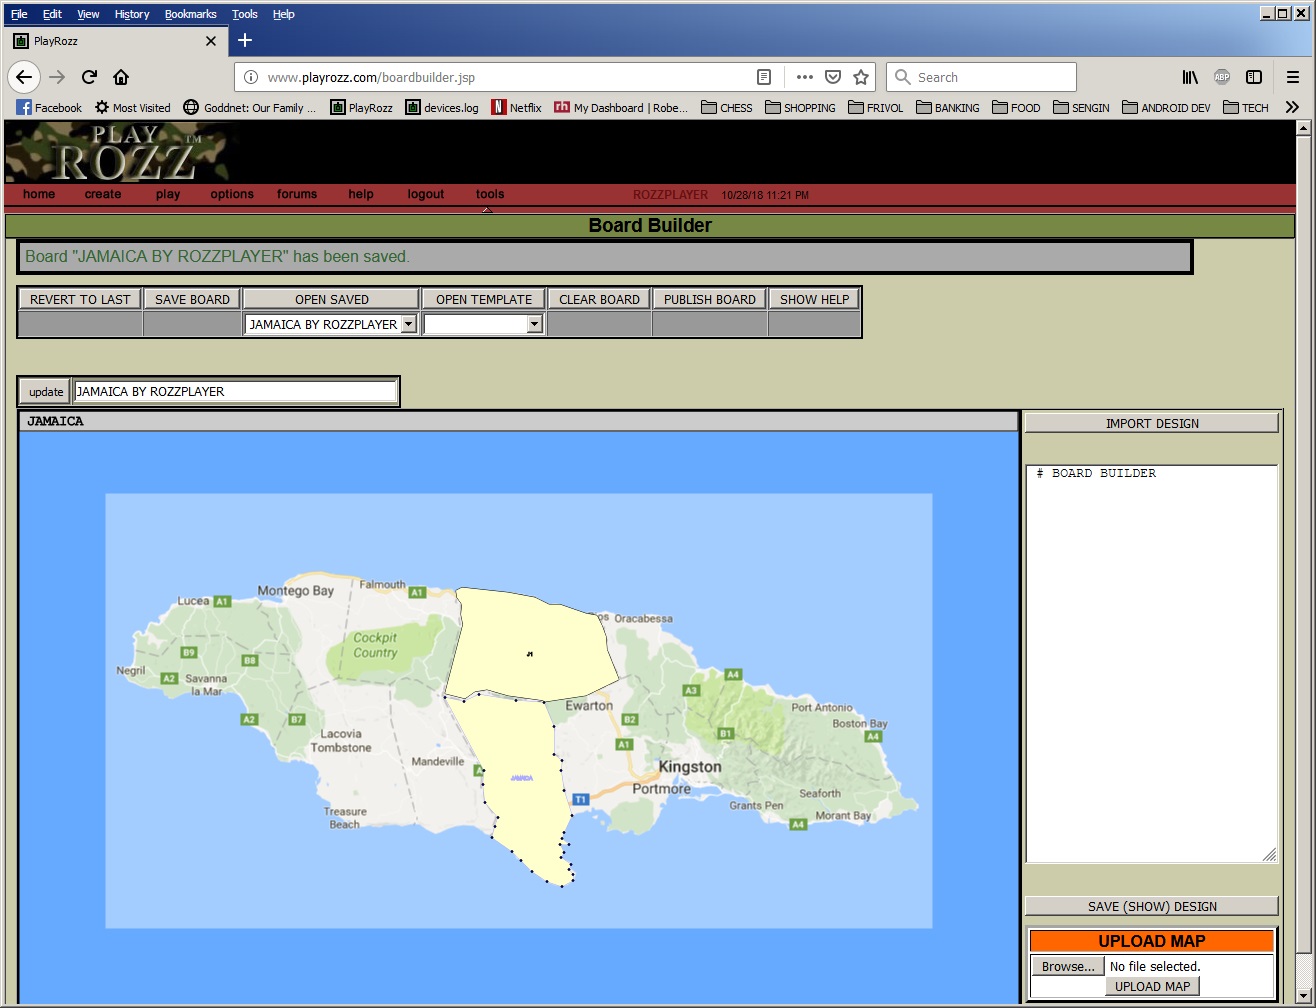
You can then zoom in (CTRL-click) to shape the borders neatly: 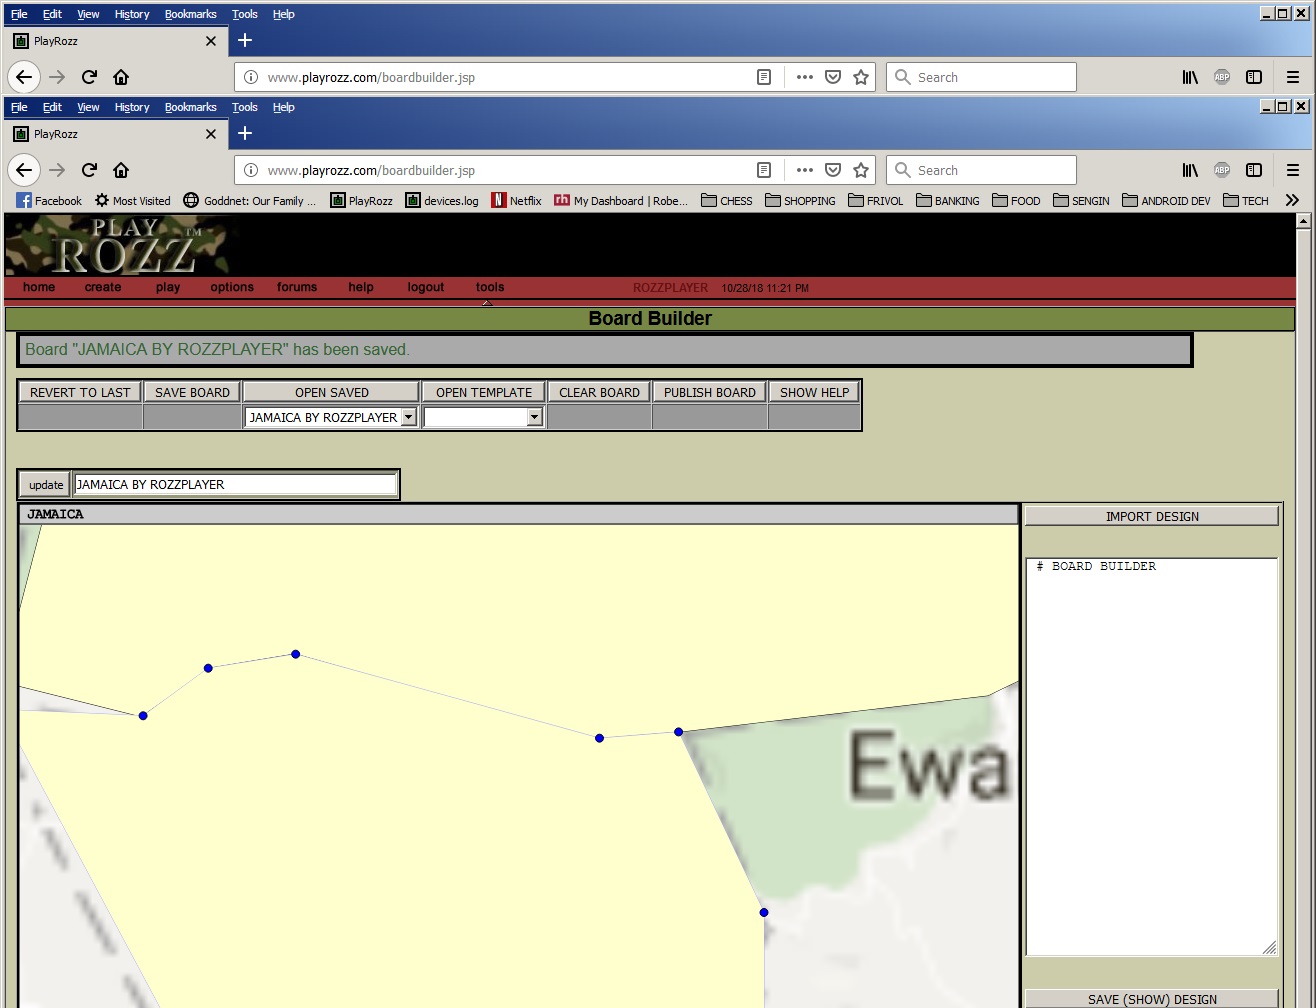
Remember to add links between your tiles! That's SHIFT-click to select one tile, then CTRL-SHIFT-click the other tile. 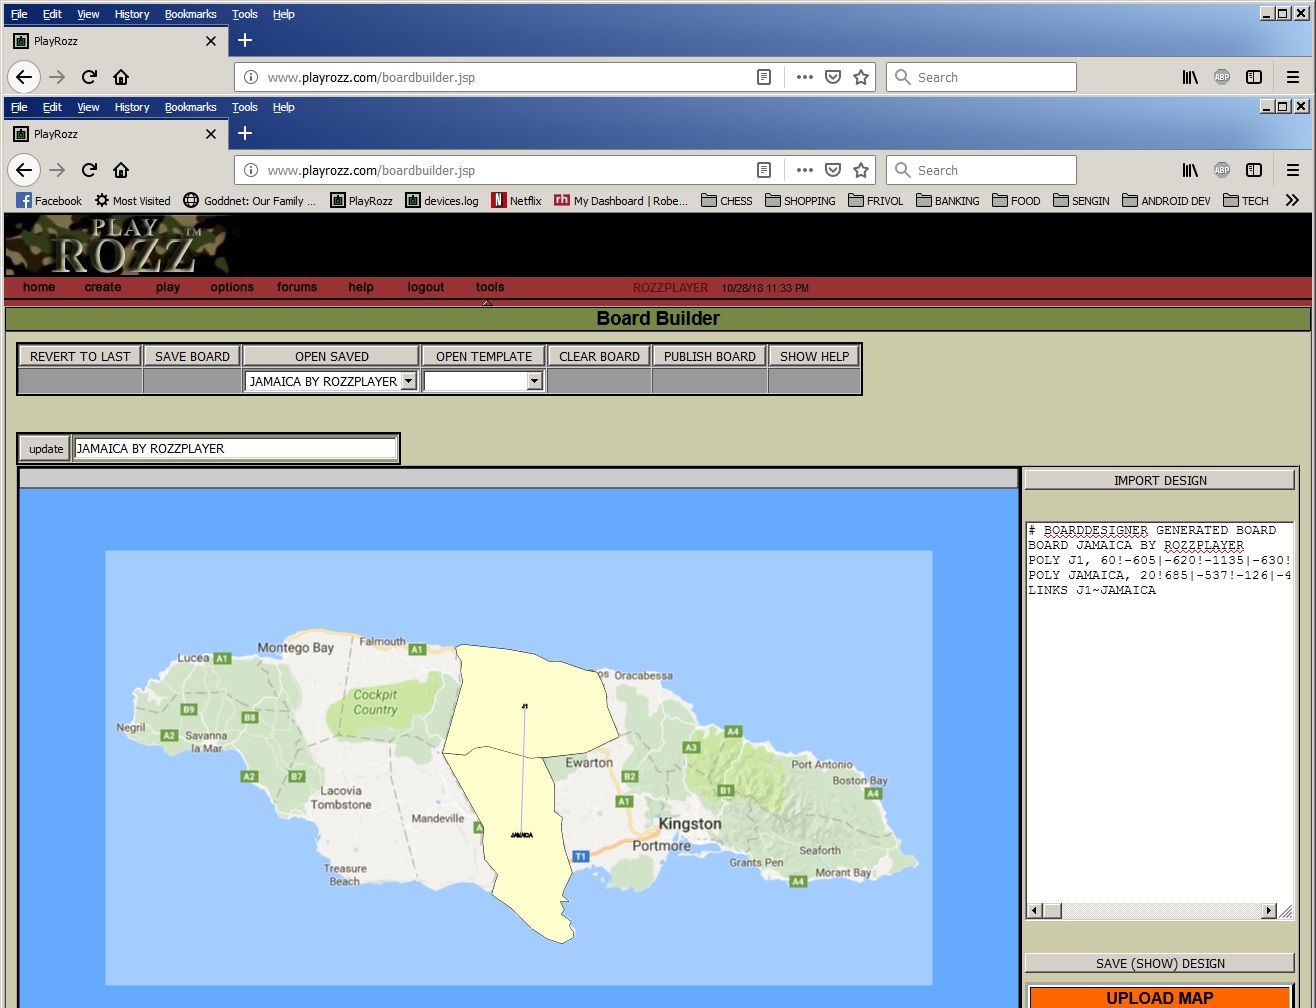
It takes a little practice, but you will find that it's pretty easy to make a board. Remember SHOW HELP for hints. If you have a polished board that you want to make available to others in their own scenarios, choose PUBLISH BOARD.
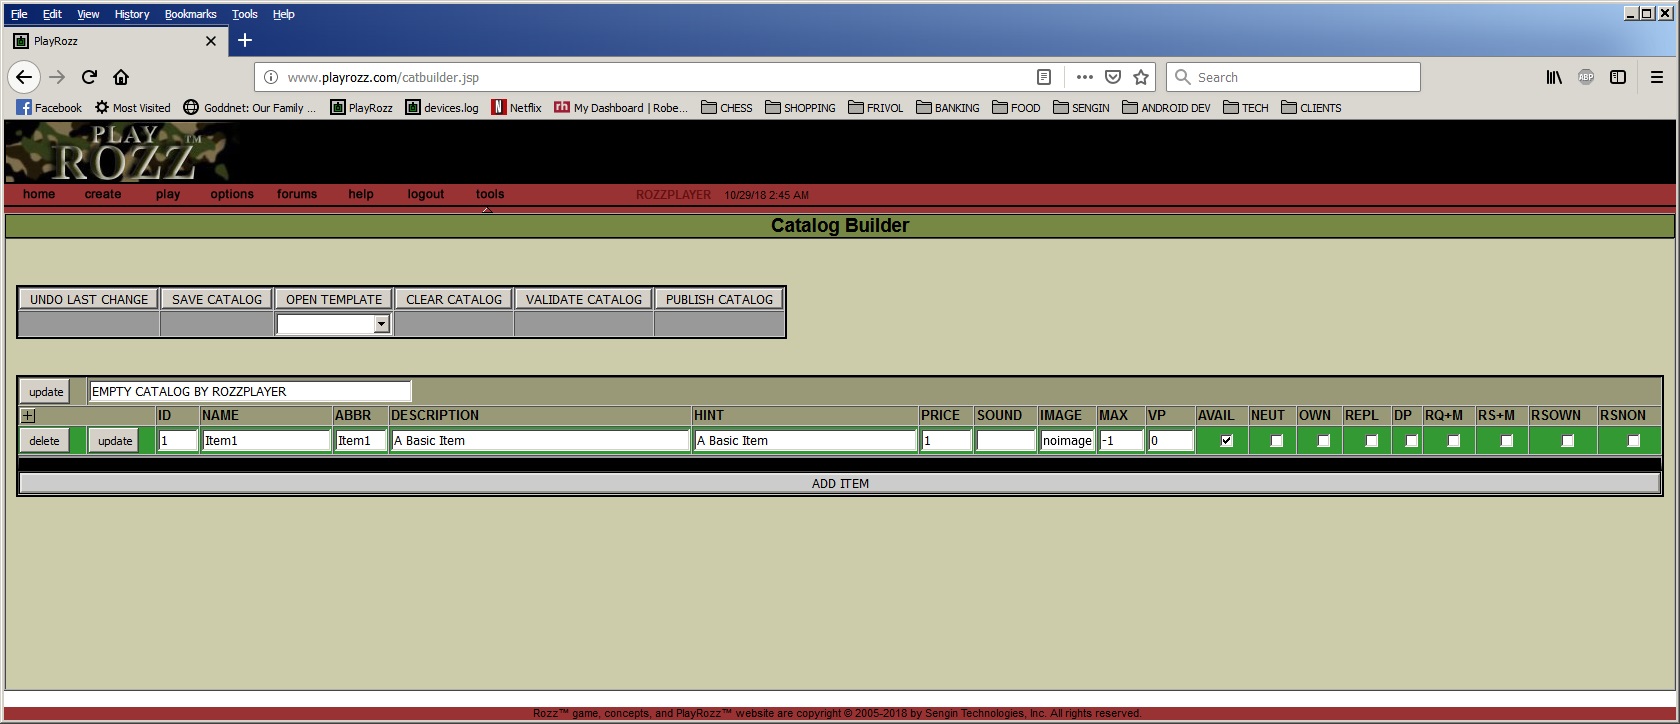
Again, You may need to expand the size of your browser to show everything, but the catalog builder basically look like this:
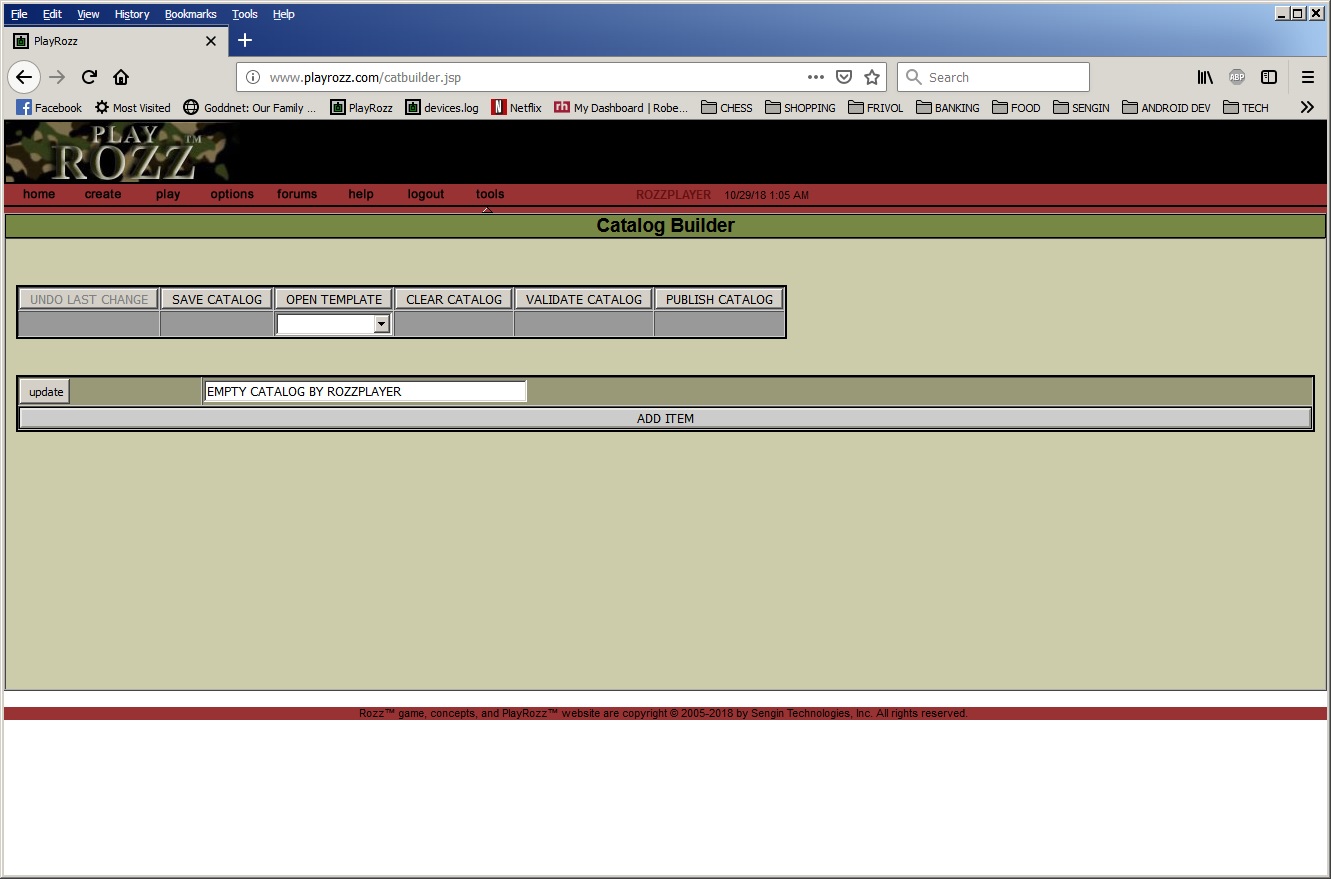
A catalog is a collection of items. Each item has characteristics that define its role in the game. The items in the catalog are interrelated: that is, they refer to one another. The entire catalog provides most of the RULES for any scenario using the catalog. As with the board builder, there are some basic things to keep in mind:
Let's start by clicking ADD ITEM to add an item to our empty catalog:
A panel shows with the new item, Item1, along with various characteristics. Let's add two more items by clicking ADD ITEM two more times: 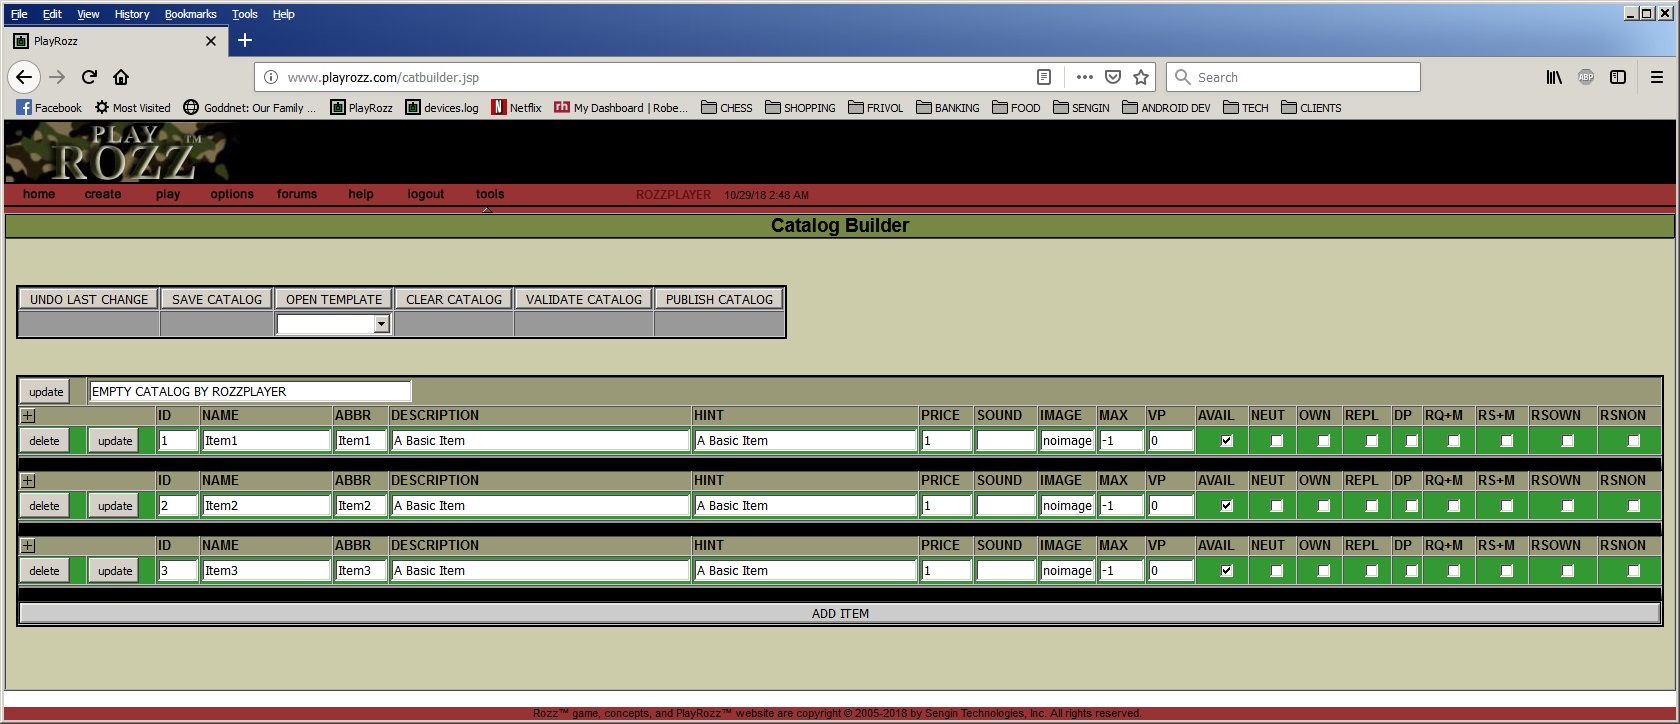
Notice that the items are automatically given sequential IDs: 1, 2, and 3. Notice also that none of the items provide Victory Points (they all have 0 in the VP column). Click the VALIDATE CATALOG button, and you will see the message:
The items provide no victory points!
Edit the first item (Item1) by changing the 0 to a 1 under VP so that it provides 1 Victory Point: 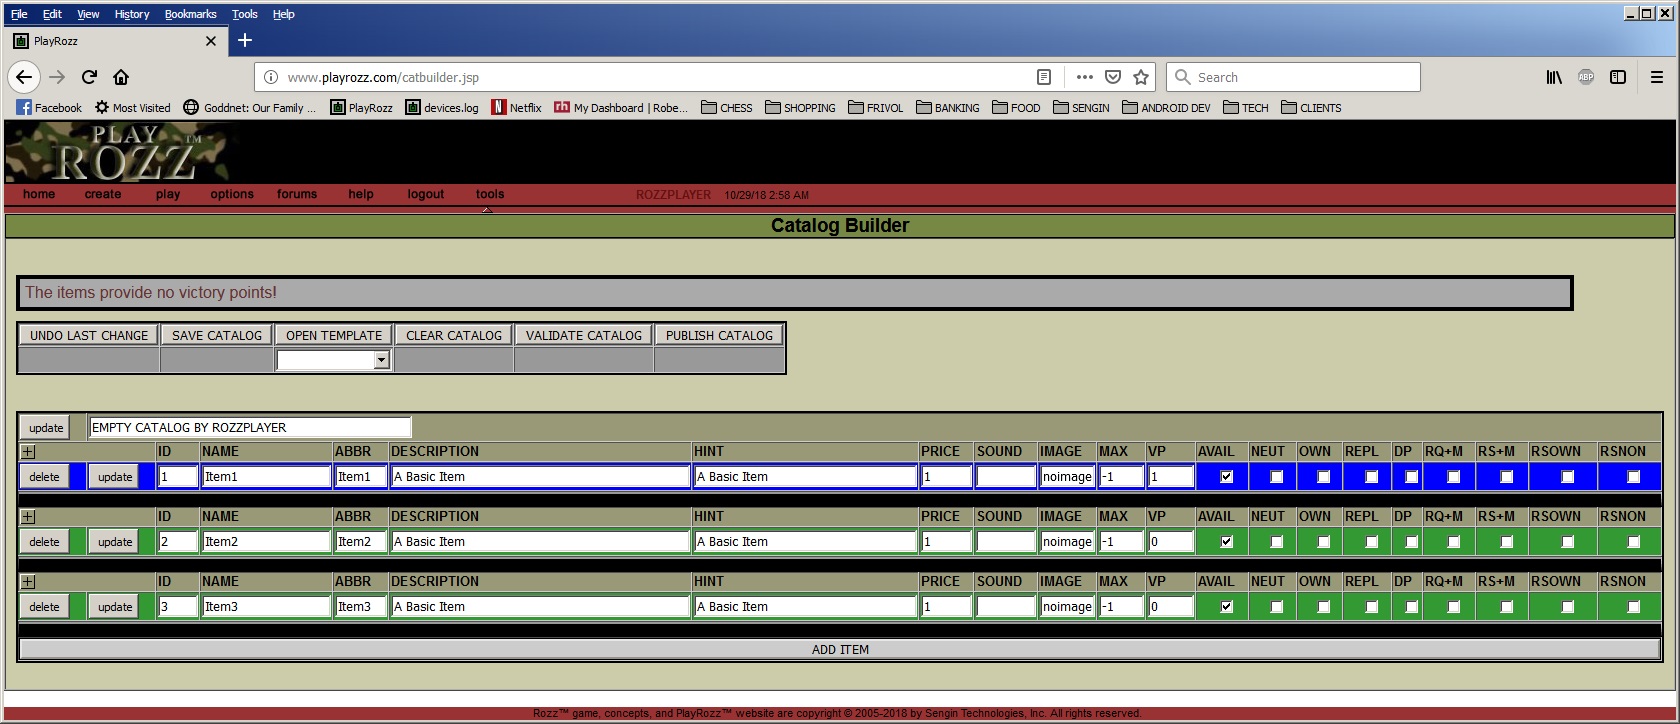
Notice that the section turns blue, so you have to click update in that section before making changes elsewhere. After you update the section, click the VALIDATE CATALOG button, and you will see the message:
The catalog is OK!
Try changing the ID of the last item (Item3) from 3 to 4. After you update the section, click the VALIDATE CATALOG button, and you will see the message:
Item #3 must have ID 3 not 4
Change Item3's ID back to 3, update that section, and validate again. You will see that the catalog is OK. You can change the name, abbreviation, descriptions, hints, and prices of your items. If you uncheck the mark under AVAIL, an item will not be available for purchase. (You can hover over the column headers, AVAIL, NEUT, OWN, etc., to see tooltips about them.) Remember to click update for each section you modify, before moving on to another section. Here we've defined the three items as ROCK, PAPER, and SCISSORS and updated the name of the catalog: 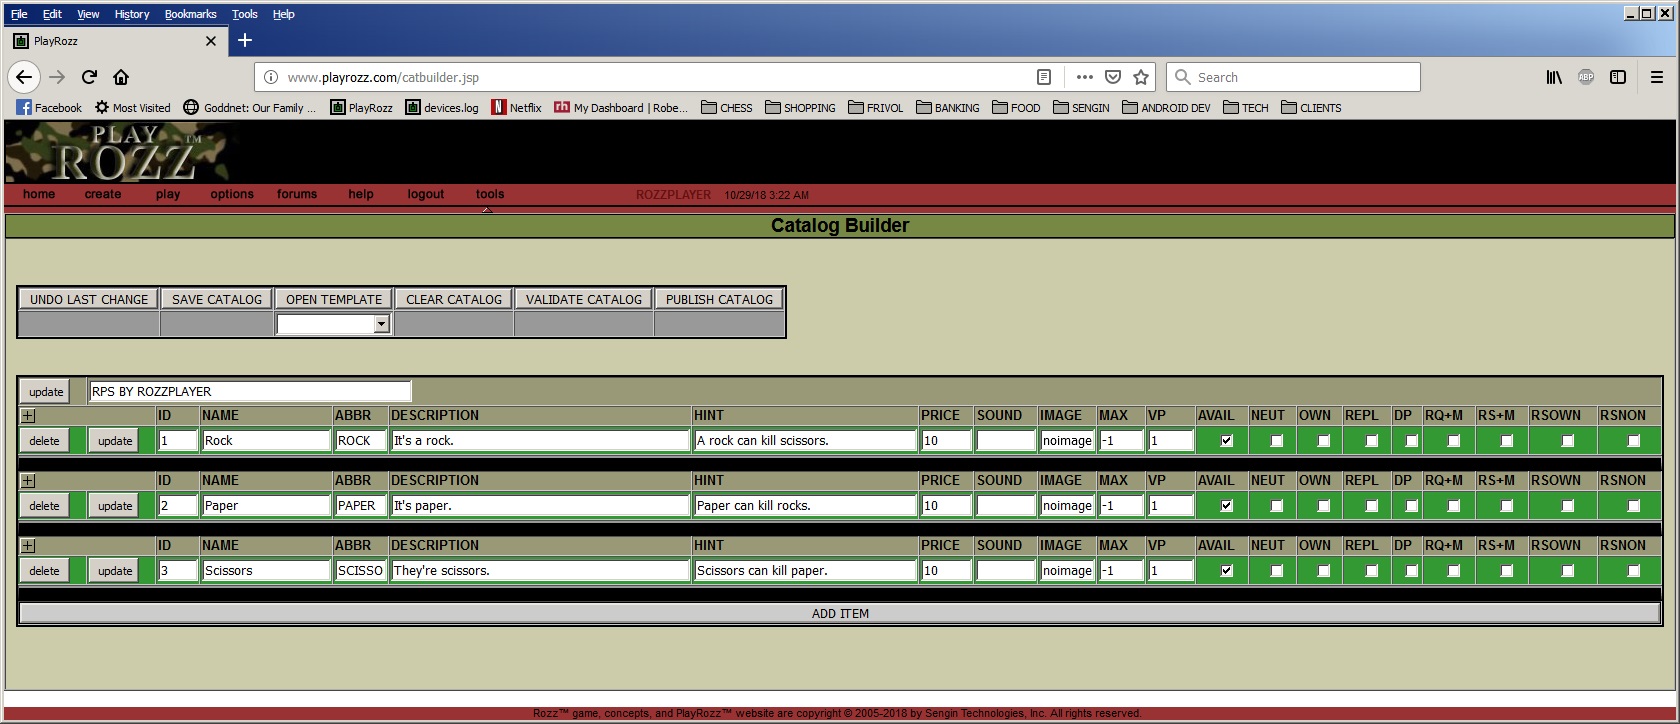
So far, these items don't do much. Let's click the plus sign (+) to the left of the section for ROCK: 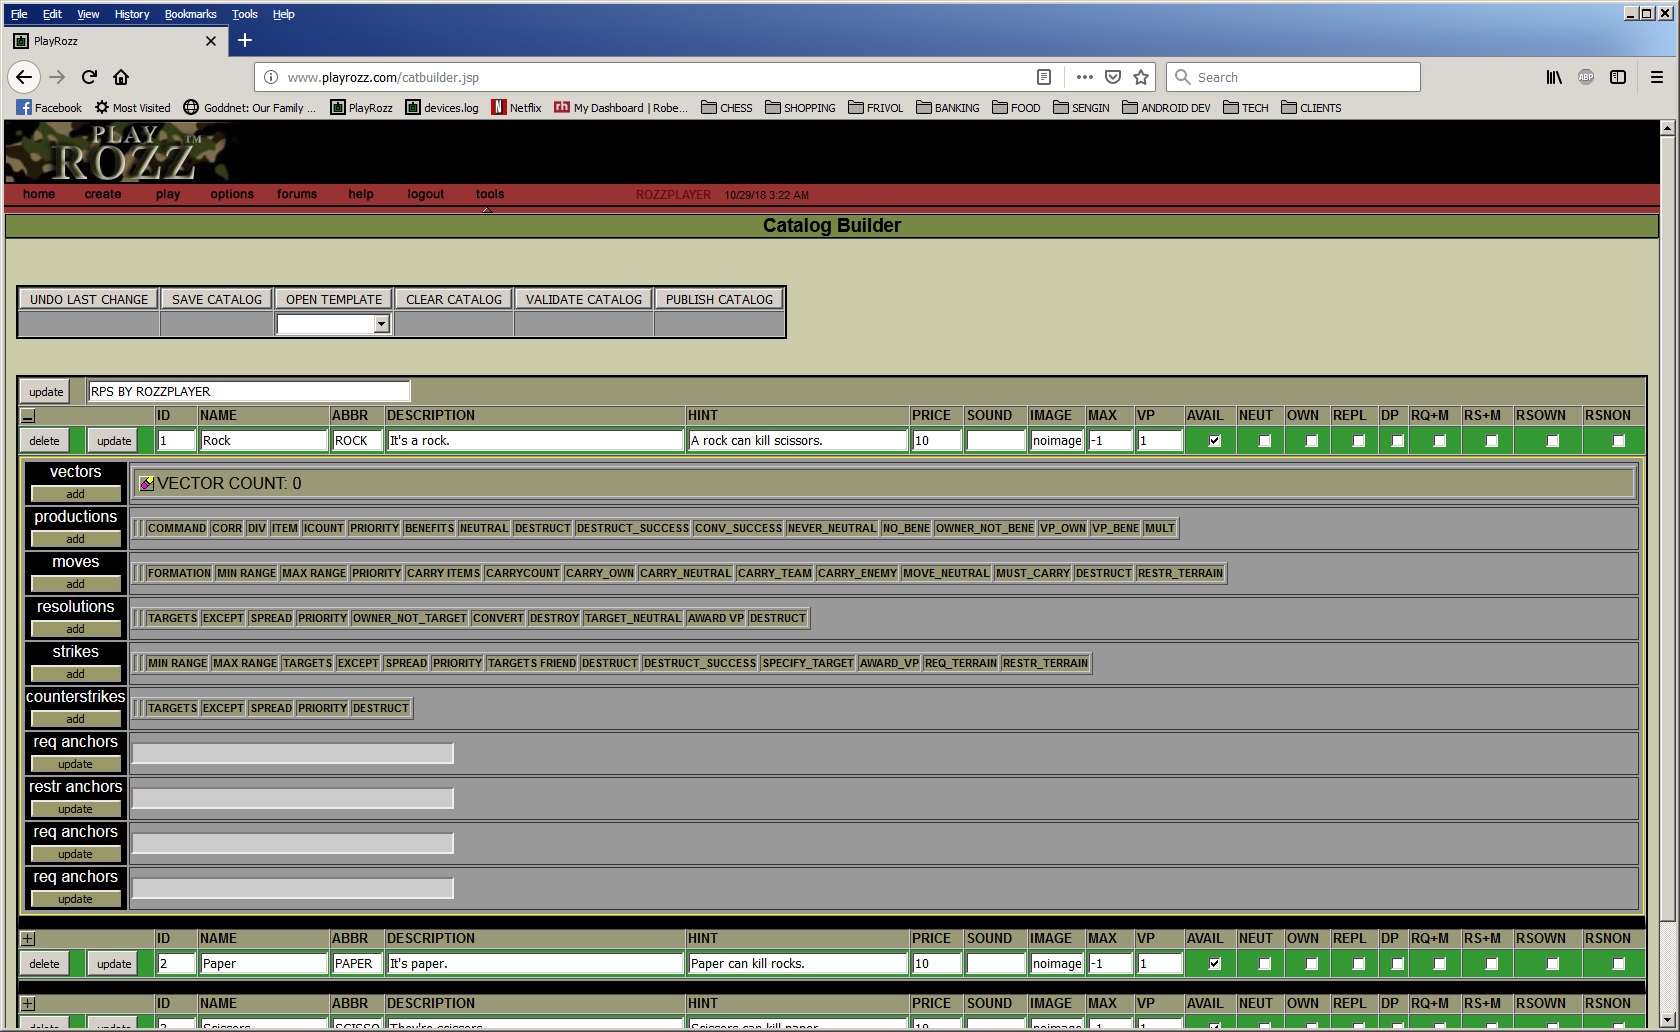
You see a bunch of confusing-looking options! You can hover over most of the headers to get an idea of what they do, but for now let's look at some basics. Click the icon with a pencil erasor, where it says "VECTOR COUNT: 0" and another screen pops up where you can draw your item: 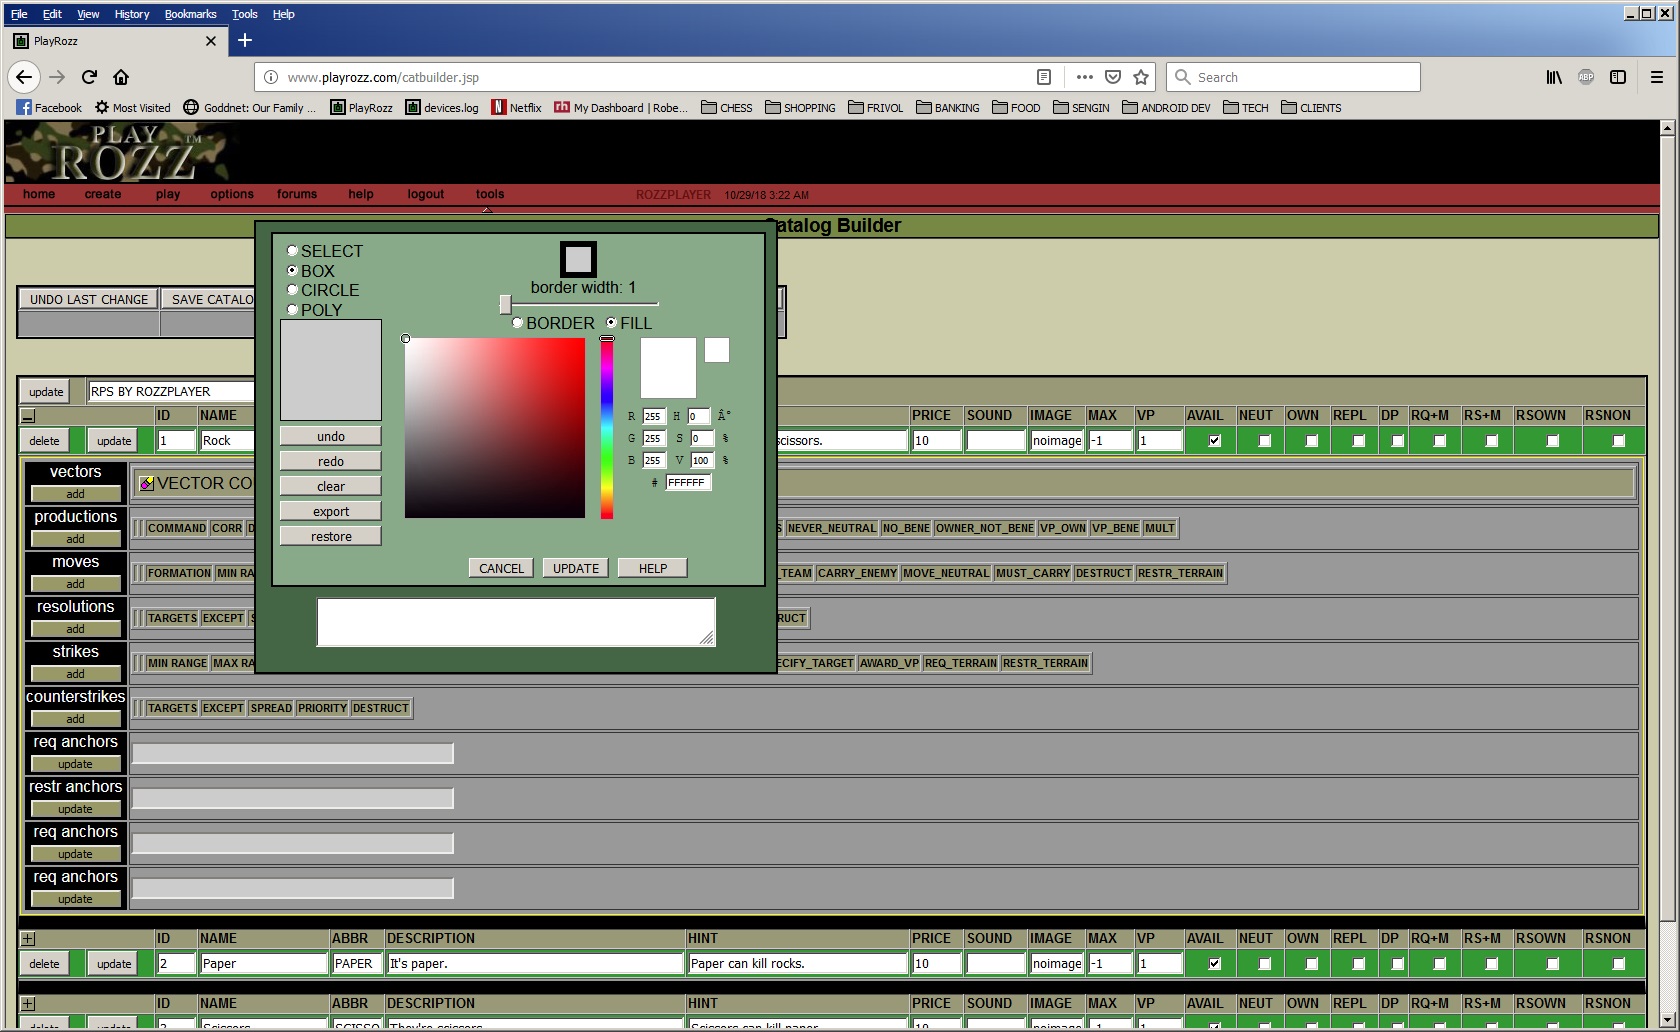
It's not the easiest drawing program in the world, but here are the basics:
It may look cool, but our item still doesn't DO much. In Rozz, items can have PRODUCTIONS (things they produce each round, such as an IC which produces $10), MOVES (the ability to move, such as ARMOR or INF), RESOLUTIONS (what happens to opposing items after they move, such as ARMOR killing INF), STRIKES (if the item can strike), and COUNTERSTRIKES (if the item counters strikes, such as an Air Defense System). Click the plus sign (+) next to ROCK to open it up again if needed, and click the "add" button for moves. Afterward, you may have to open the rock details again. It's a little glitch. 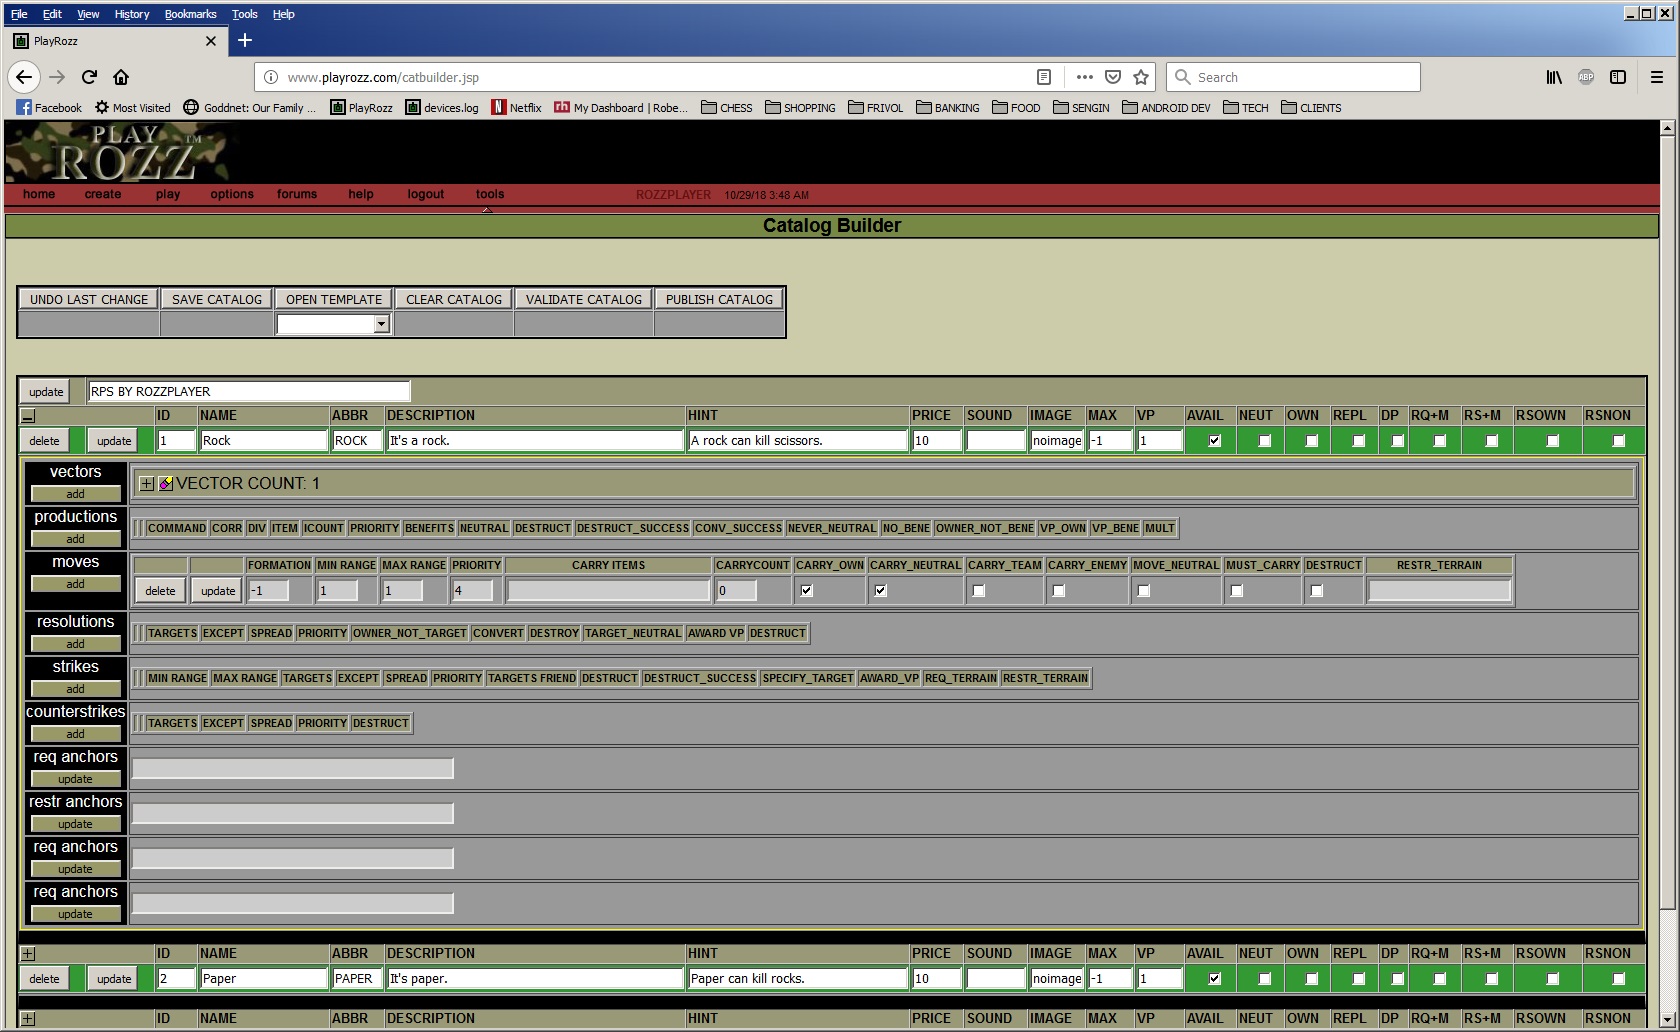
You see the item now has a default move of unlimited formation (-1 generally means unlimited for items) and can move one tile away. Let's add a RESOLUTION by clicking the "add" button for resolutions. 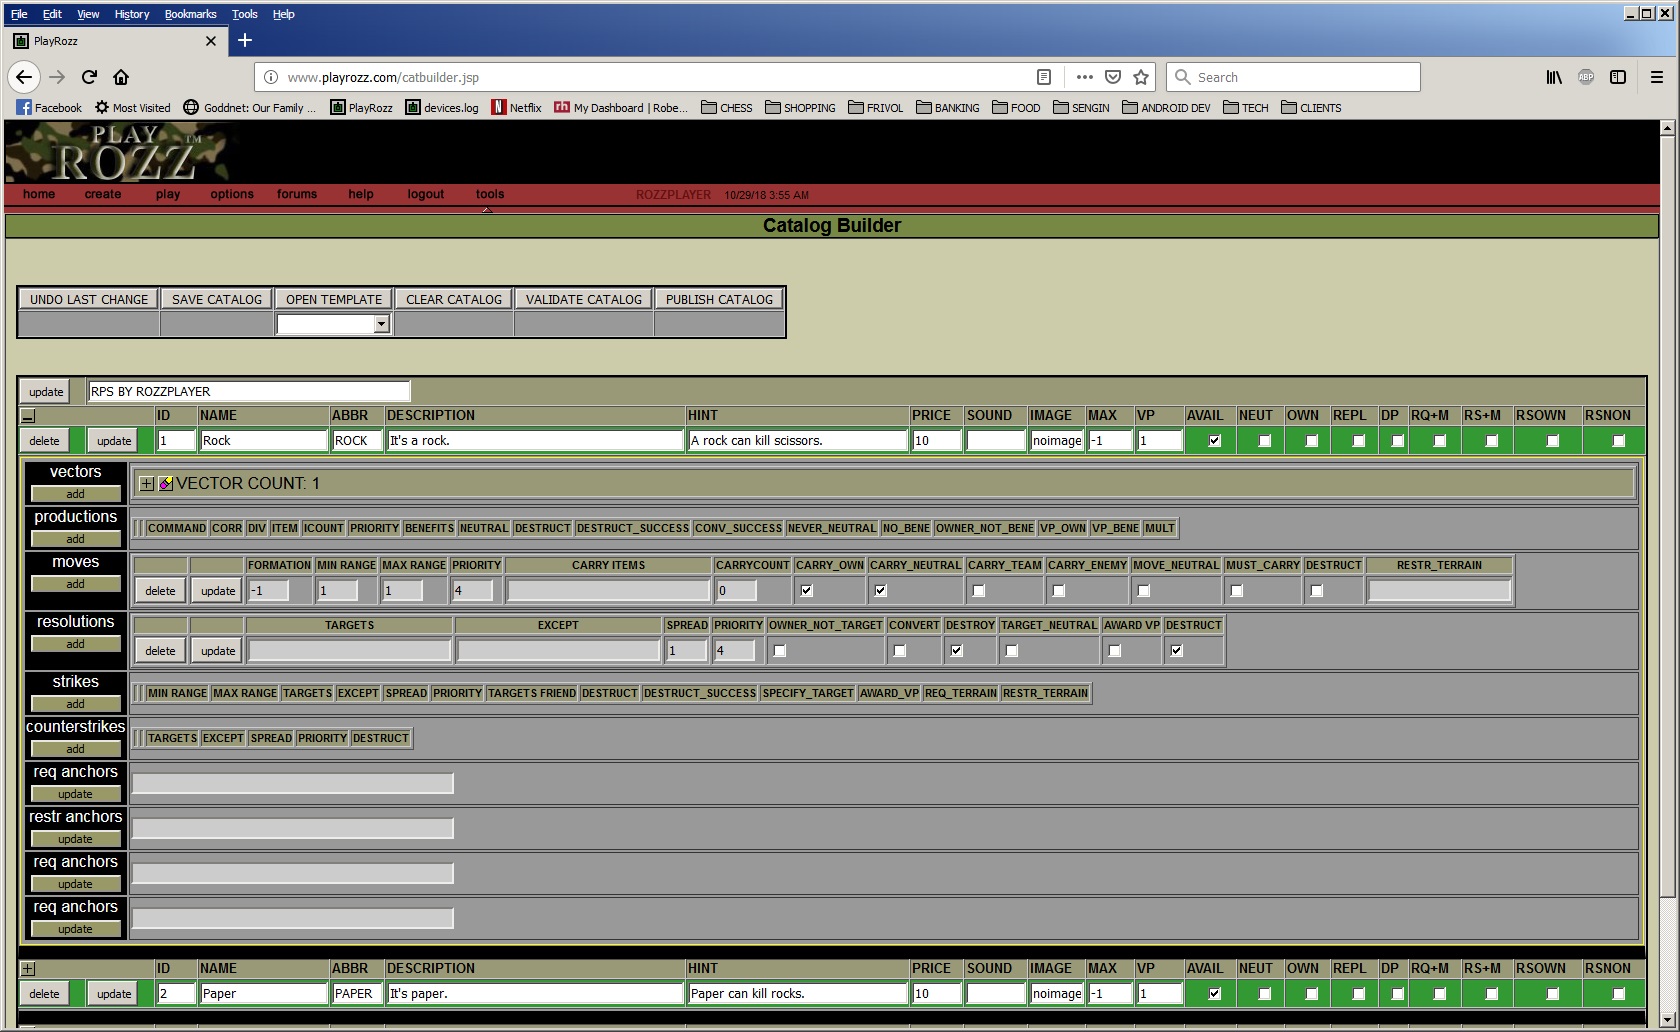
You see there is a new resolution, but there are no actual targets. We want the ROCK (ID 1) to kill SCISSORS (ID 3), so enter a "3" under targets: 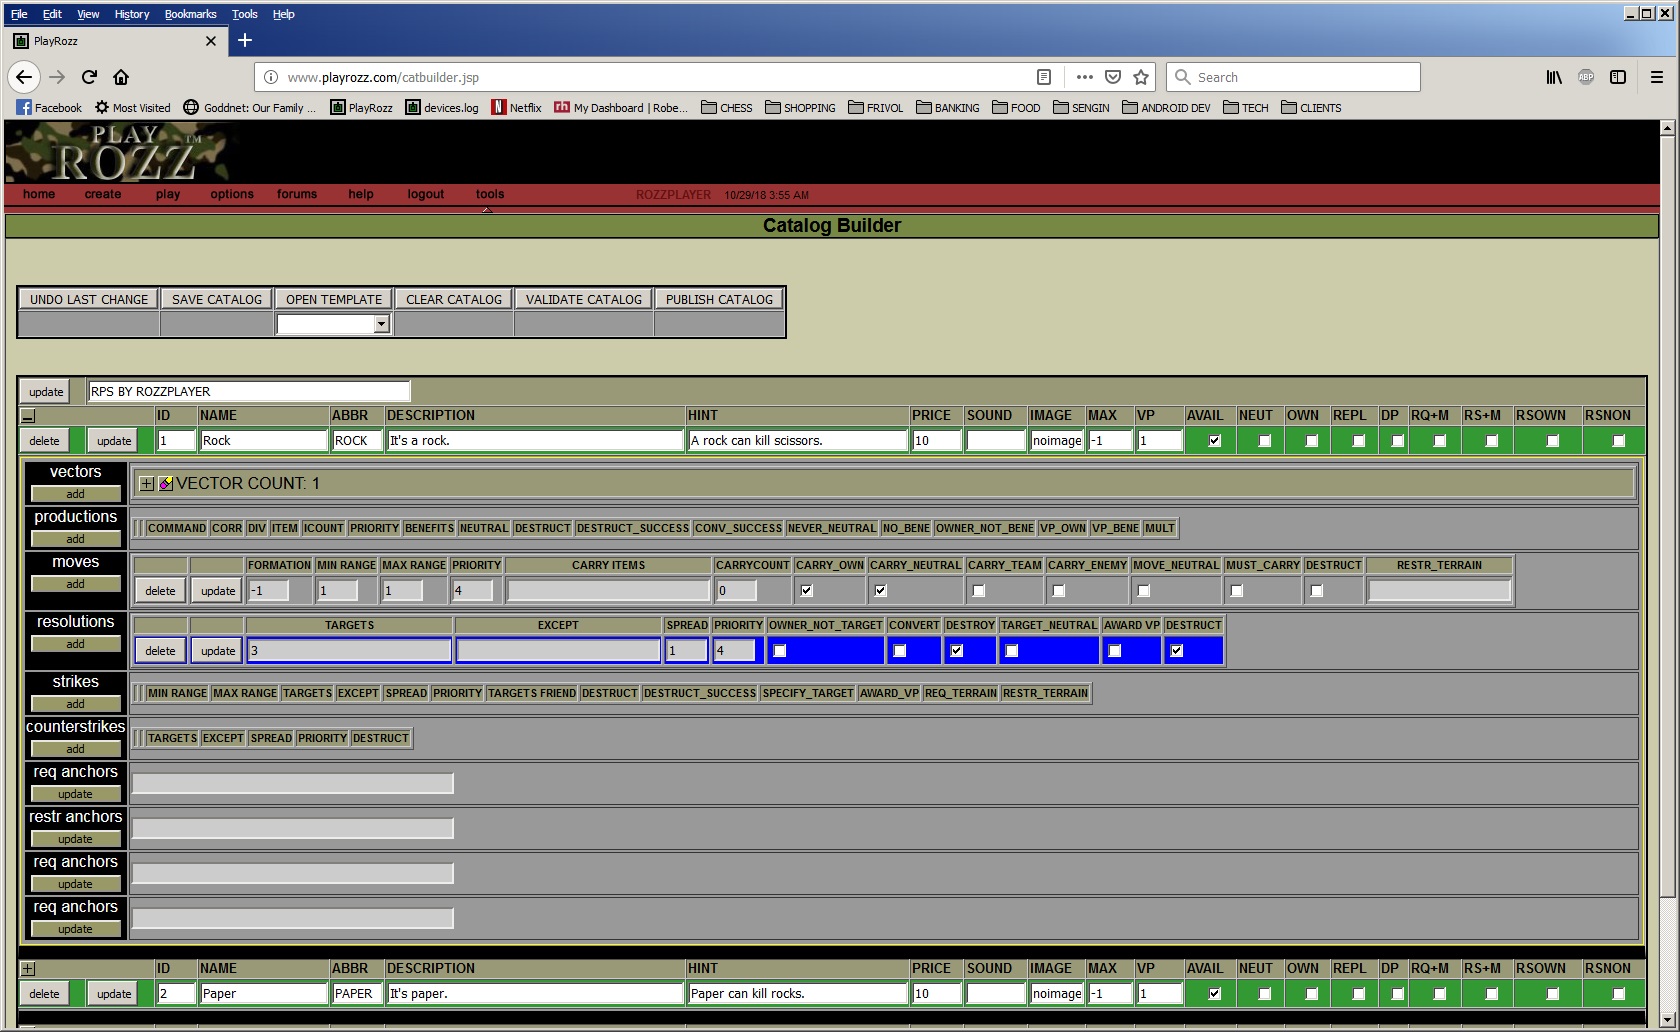
Click update in that section to save the change. Click SAVE CATALOG to save your catalog to the server. This is basically how you go about creating an item catalog. The next chapters will cover victory conditions and more advanced options. Use the OPEN TEMPLATE button to see how the existing catalogs were created, or use them as a starting point for your own catalogs.
Typically, a game will end when a player (or players in case of a tie) acquires the number of victory points defined in the scenario. The standard scenarios require a single (1) victory point, so the first person to earn a victory point wins.
There are a few different ways victory points could be awarded. If you open the standard catalog as a template (from the catalog builder) and look at the HQ details, you will see the following: 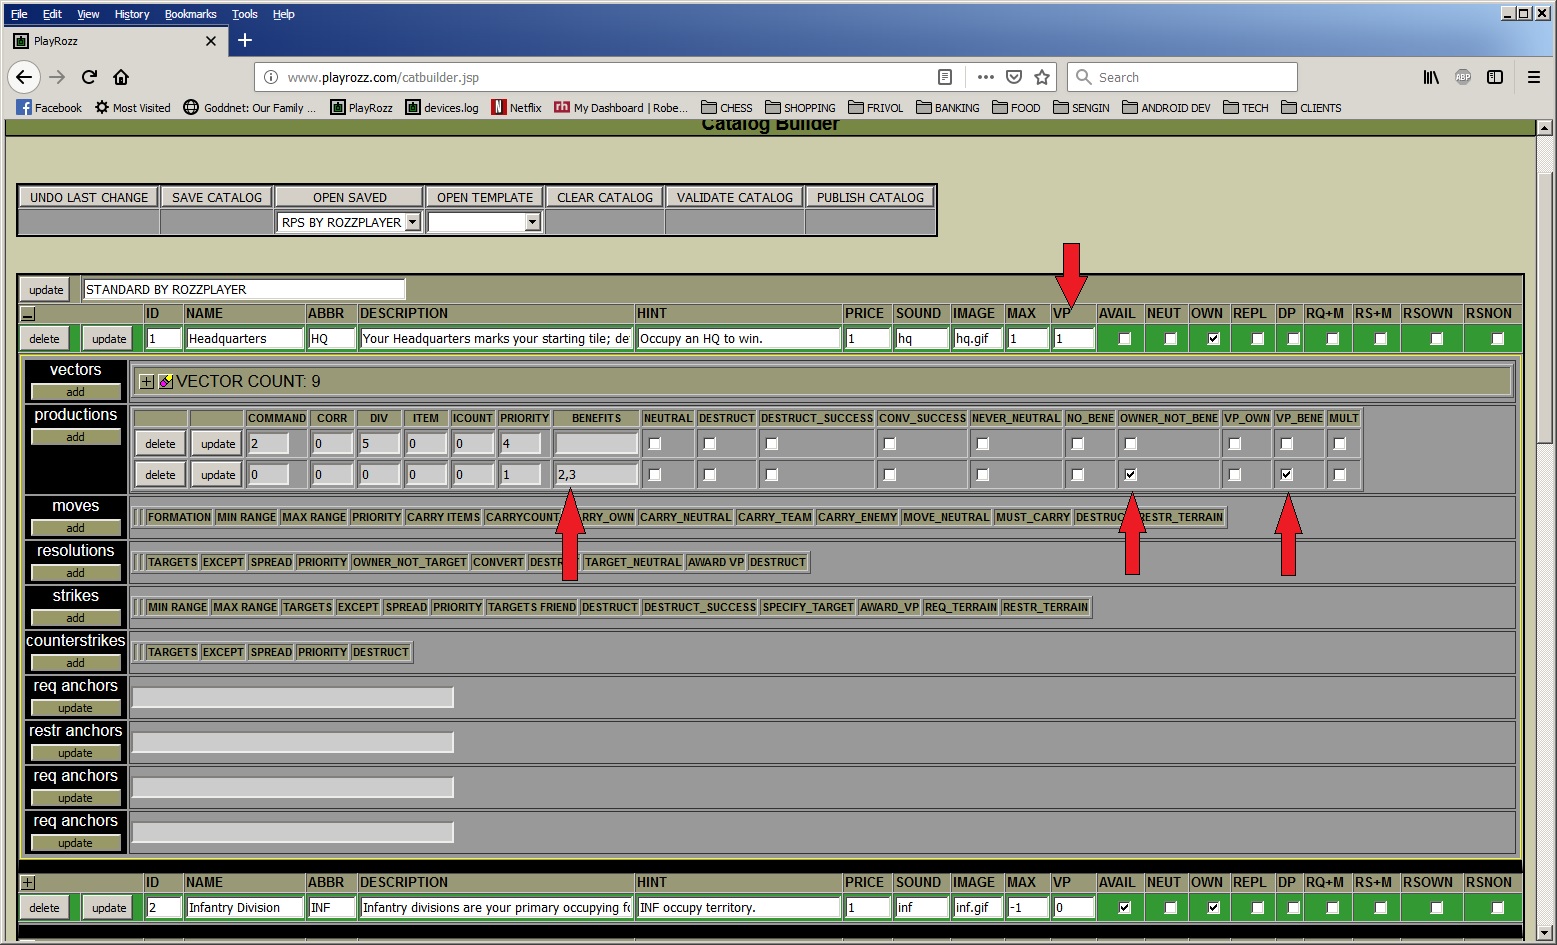
This is how the standard scenarios work. If you move INF or ARMOR into a tile with an enemy HQ, you receive a victory point because of this second production, and win the game because the scenarios only require one VP to win. (Notice that the second production has a priority of 1, so it actually takes place BEFORE the first production line with the priority of 4.) The CONQUEST scenarios work a little differently, since you have to take over everyone's headquarters rather than just one. These scenarios are further complicated because the HQ may change hands more than once. If you were to look at a conquest catalog (this is looking from the SCENARIO builder) and look at the HQ details, you will see the following: 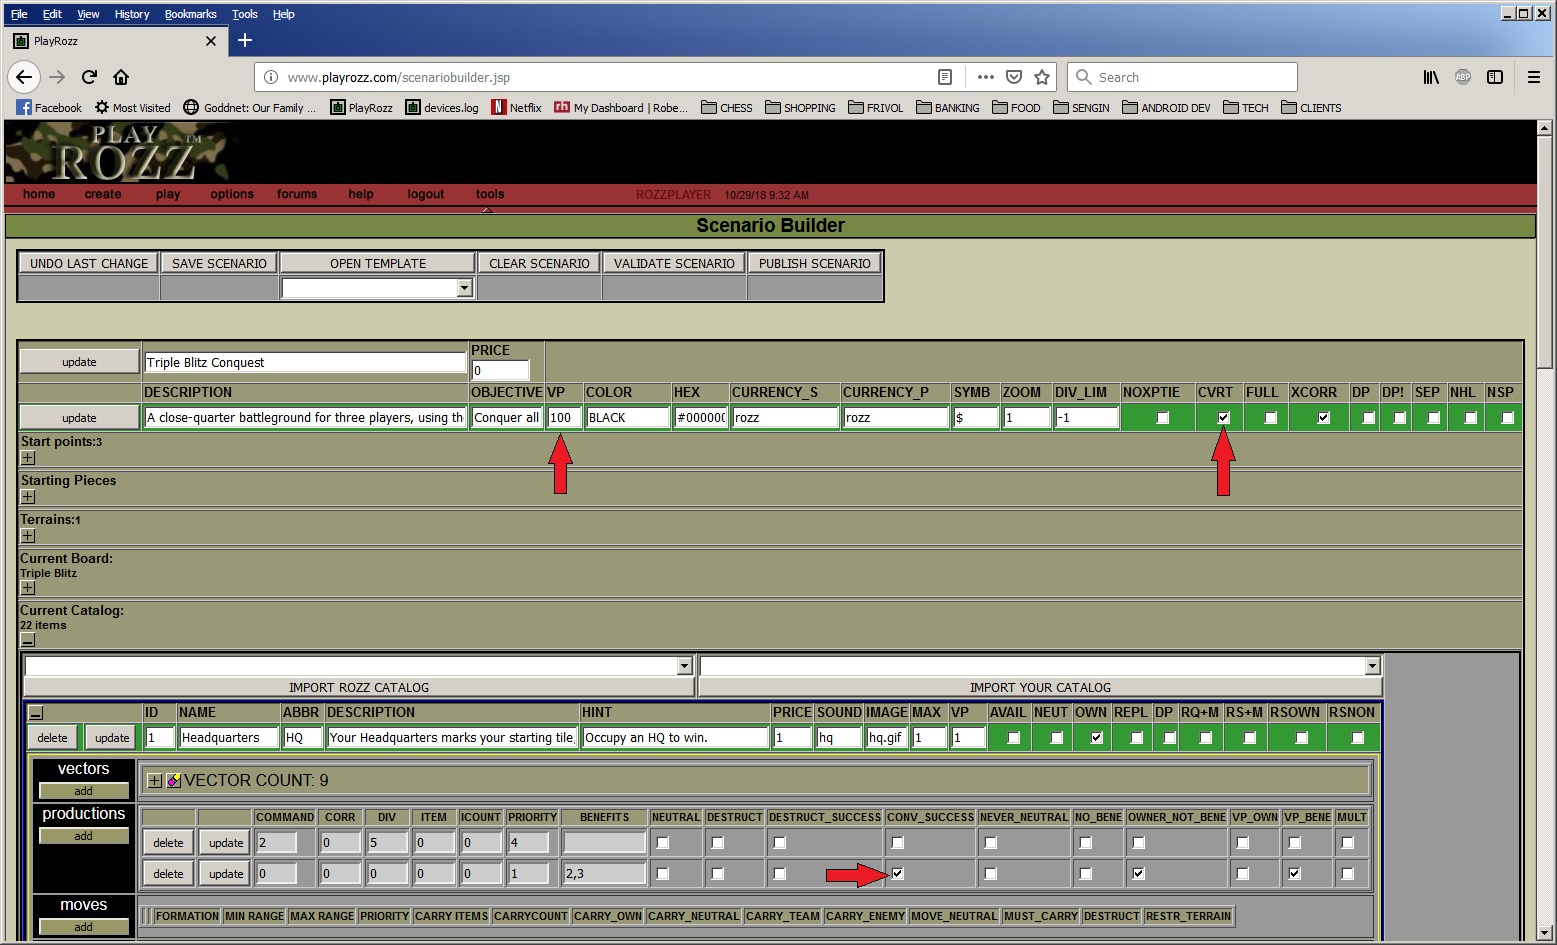
Conquest scenarios rely on an internal game mechanism that marks a player as DEFEATED when he has NO commands at his disposal. Essentially, when you move your ARMOR or INF into another player's HQ, this second production line (with priority 1) awards you a VP as in the standard scenarios, but on doing so the HQ becomes yours. With no HQ, your opponent has no commands (since the commands come from the HQ's first-line production) and he is marked DEFEATED. When he is defeated, you (as the defeater) get his stuff because of the CVRT setting. When everyone else is defeated, you are declared VICTOR by a separate internal game mechanism. Granted, that's a pretty complicated victory condition, but conquest requires it. A player could take over someone's HQ (so then he would have two HQ) and then lose his original HQ, but he would still have his new HQ remaining and wouldn't be defeated. The mechanics provide flexibility to handle various ideas you may have for scenarios. Consider, for example, the following settings: 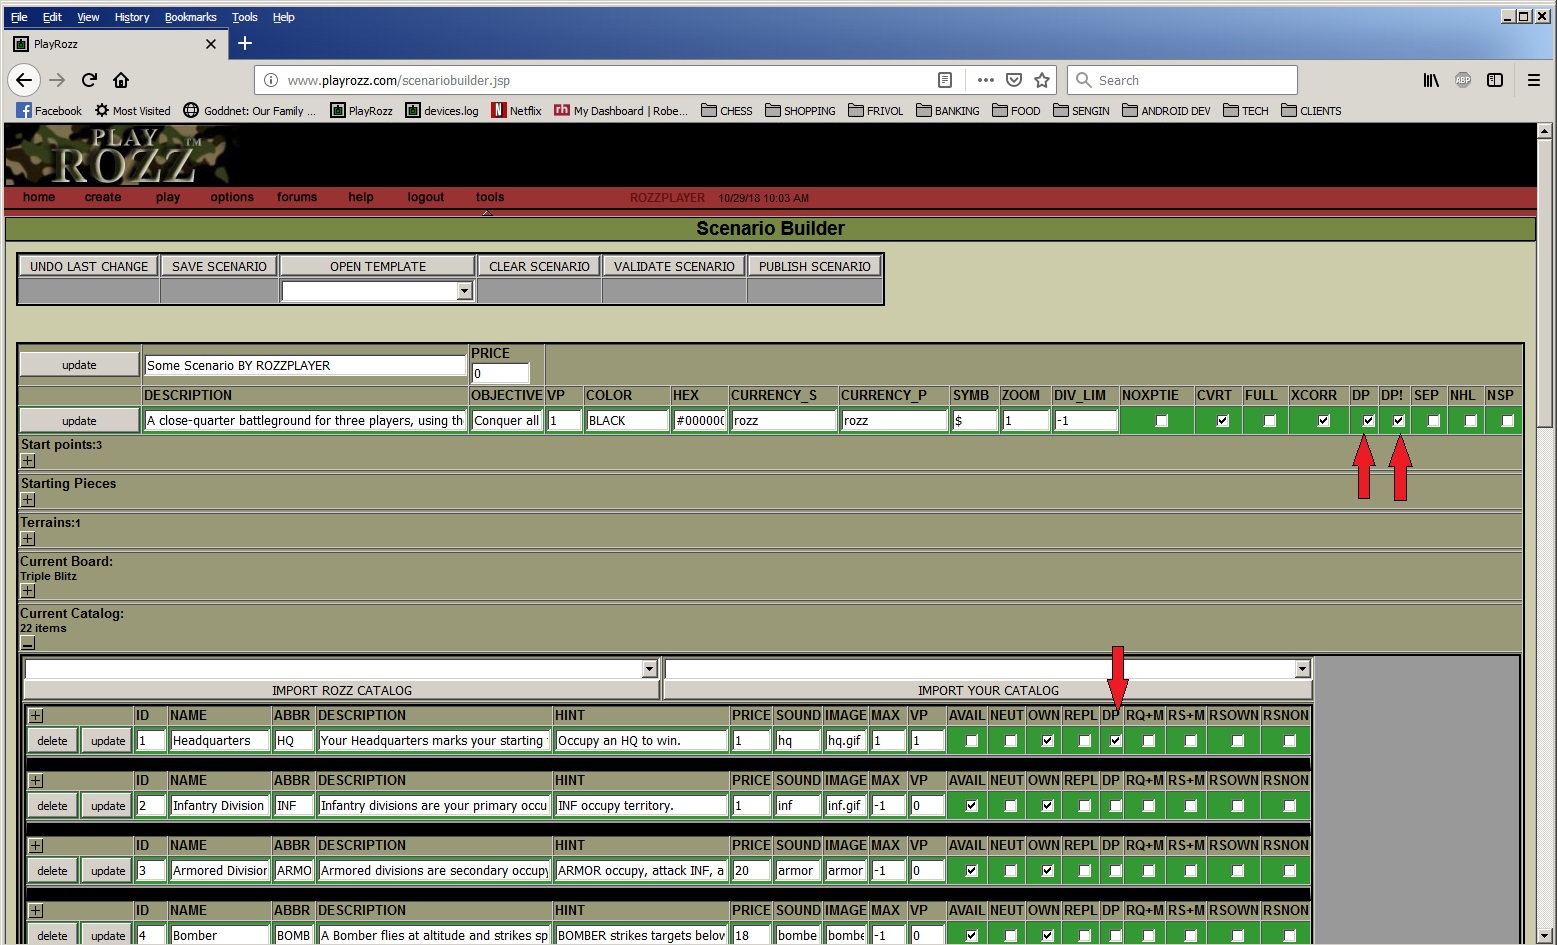
These settings provide for regicide-type victories where players are defeated when certain items are destroyed. There are also victory settings for items under move resolutions and strikes: 
In both cases, the setting awards victory points from successful targets. This can also be handy for regicide-type scenarios where a KING can get killed from a move or strike. These settings should provide for a wide variety of victory conditions in your custom scenarios. |